Written by Jan Otte, Tuesday 22 October 2019
This blogpost describes a way how to try out our freshly released product - WebAccess/VPN.
This product is focused on bringing together standalone networks scattered around the globe and unifying it under the hood of one secure network, easily accessible and manageable.
The product comes in two versions - regular and Free, while the Free is limited by a number of connected devices so that you can try out all the features without a need a paying for any license. Note: the Free version of the product can not be upgraded.
The name WebAccess/VPN brands the product into the WebAccess products family. That said, the product (as a technical solution) is completely standalone piece of SW.
For the description of what the product can do, please see WebAccess/VPN pages. Because Advantech CZ R&D is the developer of the product, there will be more posts coming, showing use cases and features of the product later on. Today, all we want to do is to show you how to run one of the possible installation modes of the software to easily check out what's available in the initial version.
The default mode of operation of the initial SW version is via Amazon EC2. To check out VPNP (informal name of the product is VPN Portal) you need a working account on Amazon EC2. The free version of the account is enough. More on the Amazon EC2 accounts can be found on Amazon site.
The Free version of the product is available on the Amazon Marketplace. Following instructions will guide you through the process of running the product step by step:
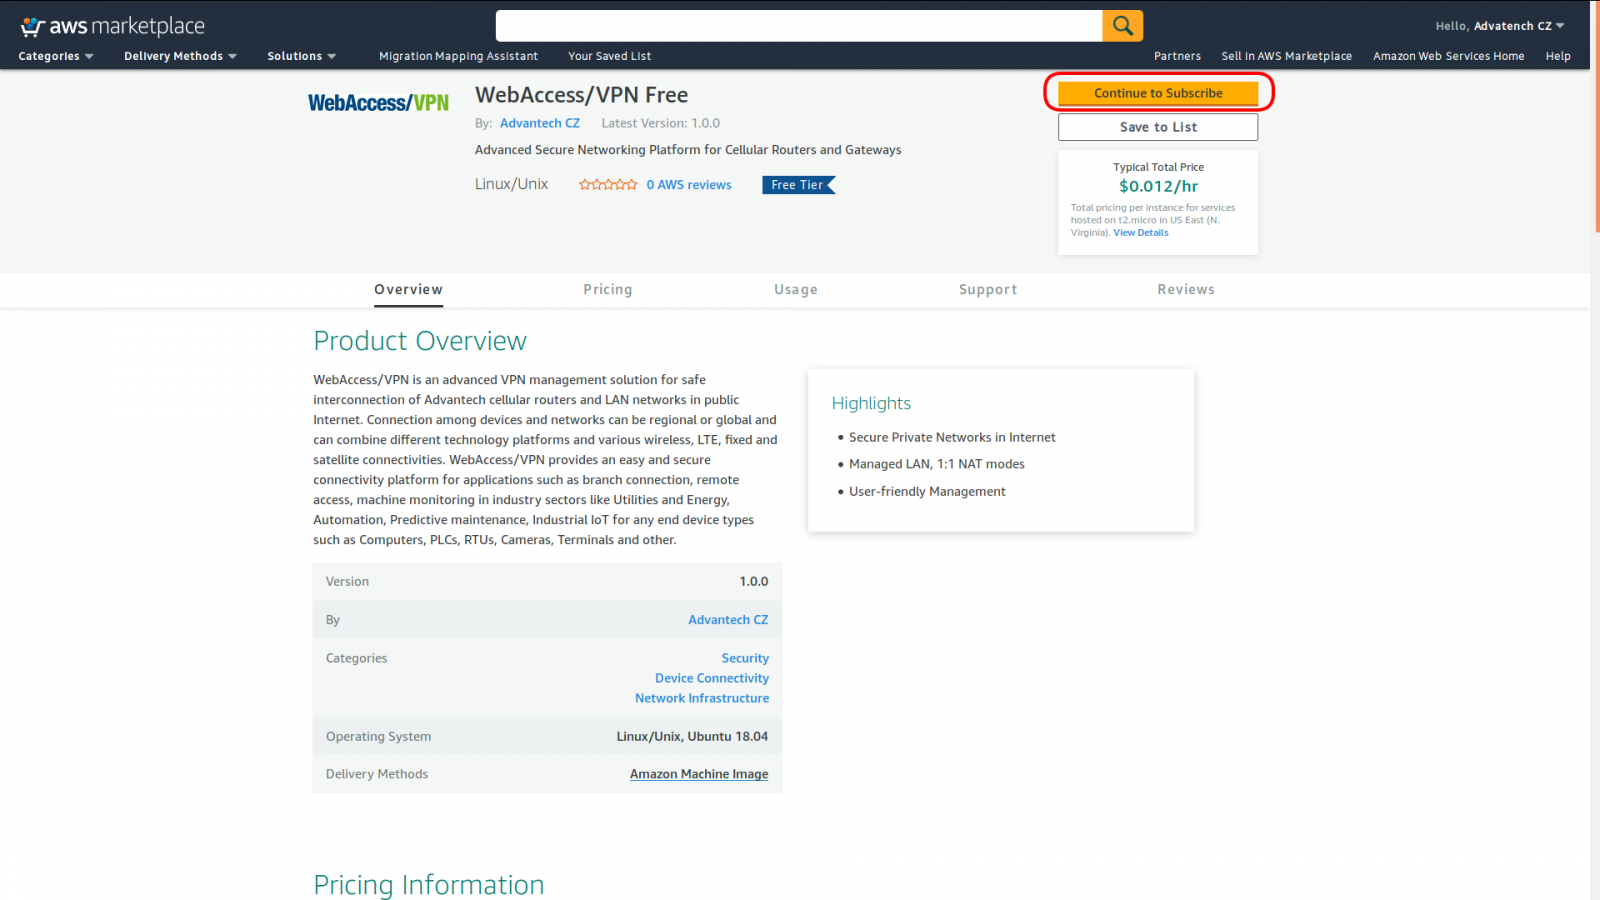
If you are not logged in your Amazon AWS in the running browser session, you will be asked to do so.
When starting your first image on Amazon, you will be asked to accept the AWS agreeement.
The table below the terms summarizes costs above the ones Amazon is charging (none - we do not charge anything for the Free product version).
There may be some delay before Amazon processess your acceptation of AWS agreement though it should not take more than a minute. Once the AWS agreement is done, you may continue by clicking on "Continue to configuration" as shown on the next image.
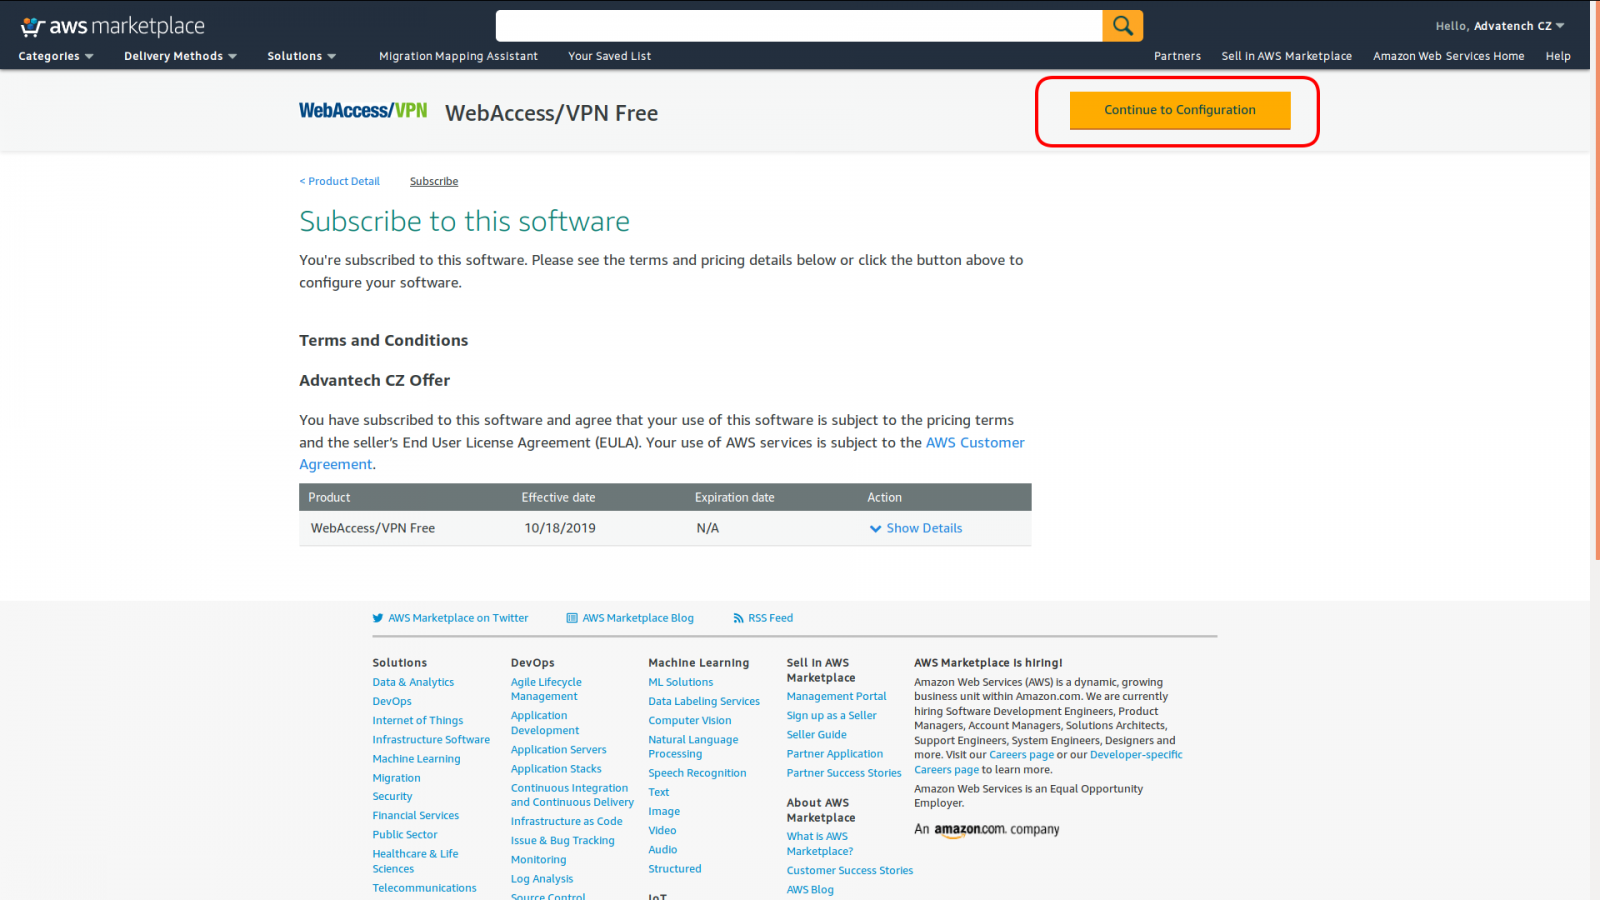
Configuring image startup
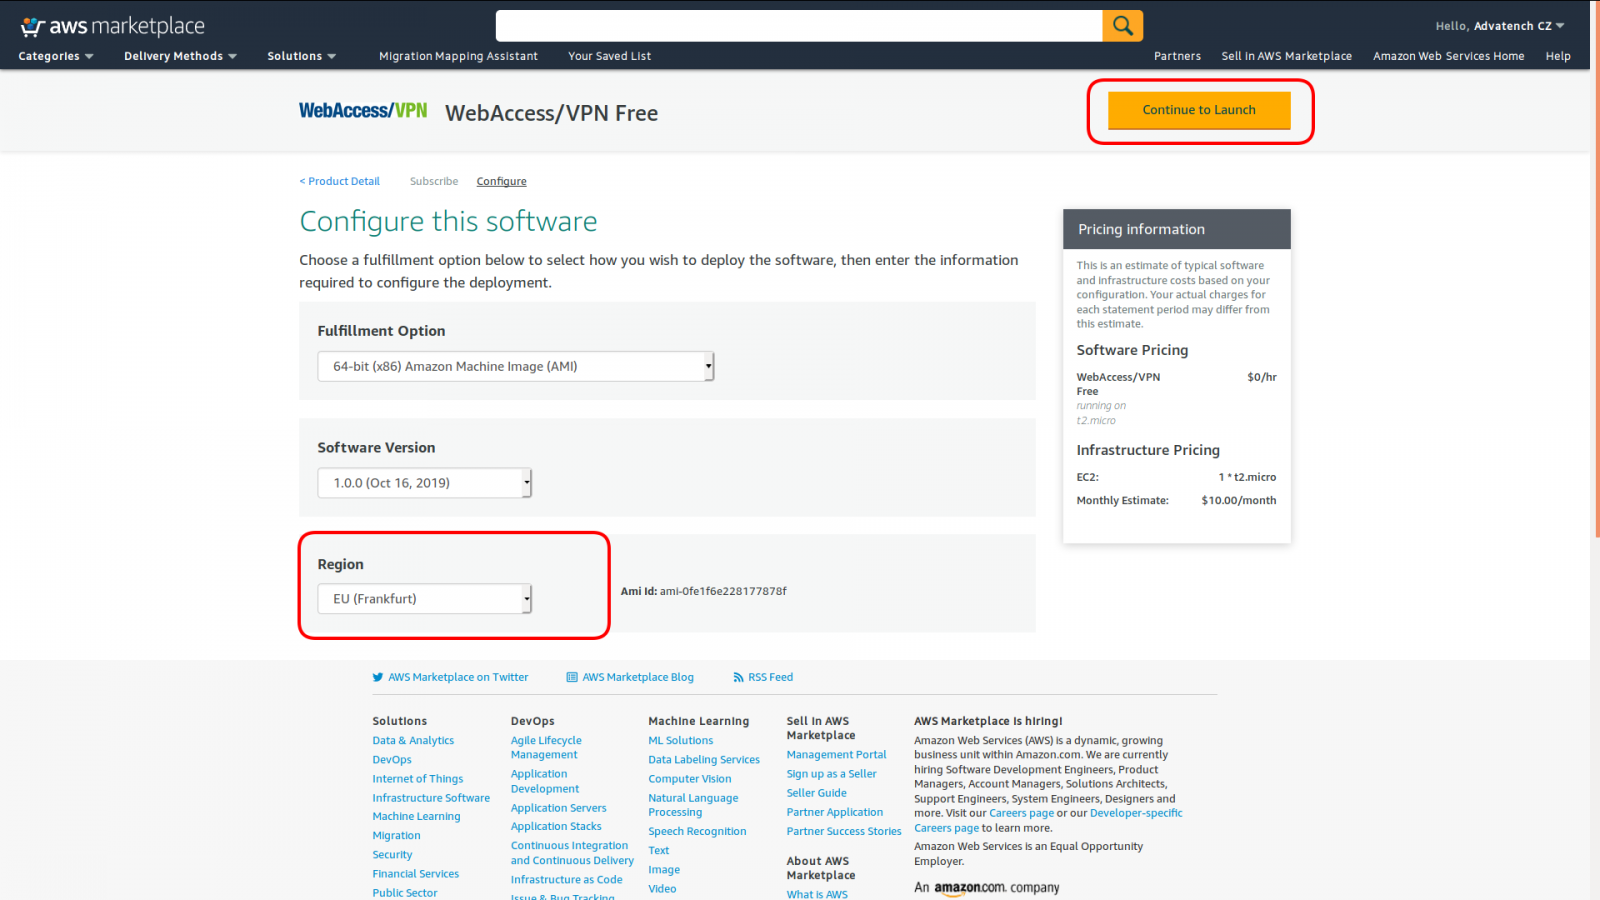
In the next step, you select the Region you want to run the image at and click on "Continue to Launch" as illustrated on screenshot below:
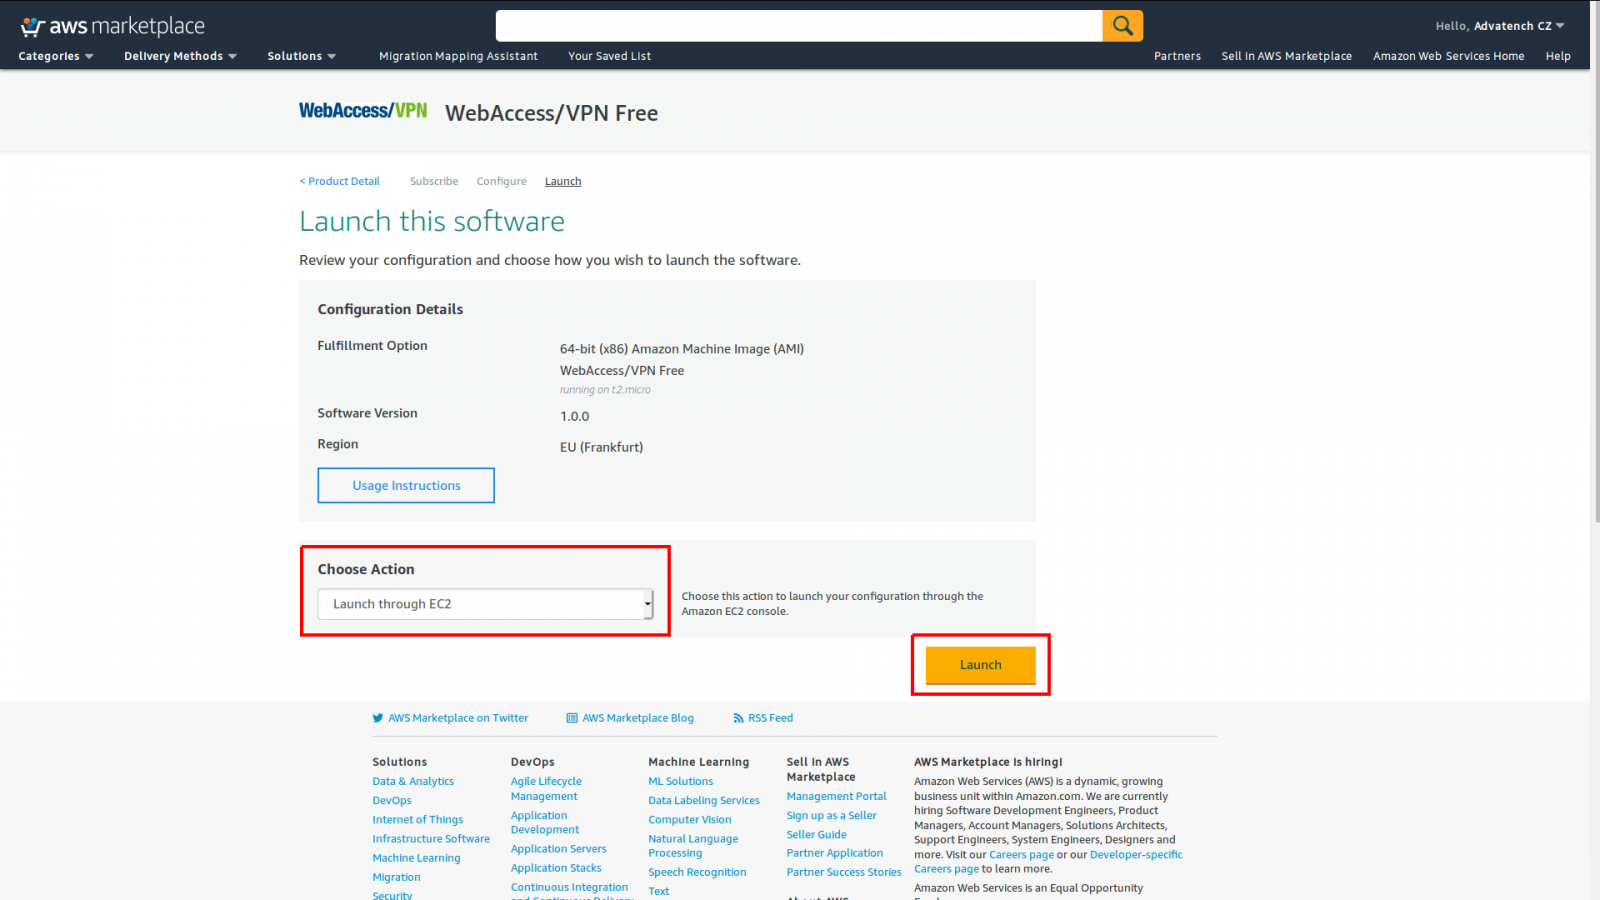
In the next step, you need to select the "Launch through EC2" Action and confirm it by "Launch". Also note that here you can inspect the instructions on proper setup by clicking on "Usage Instructions".
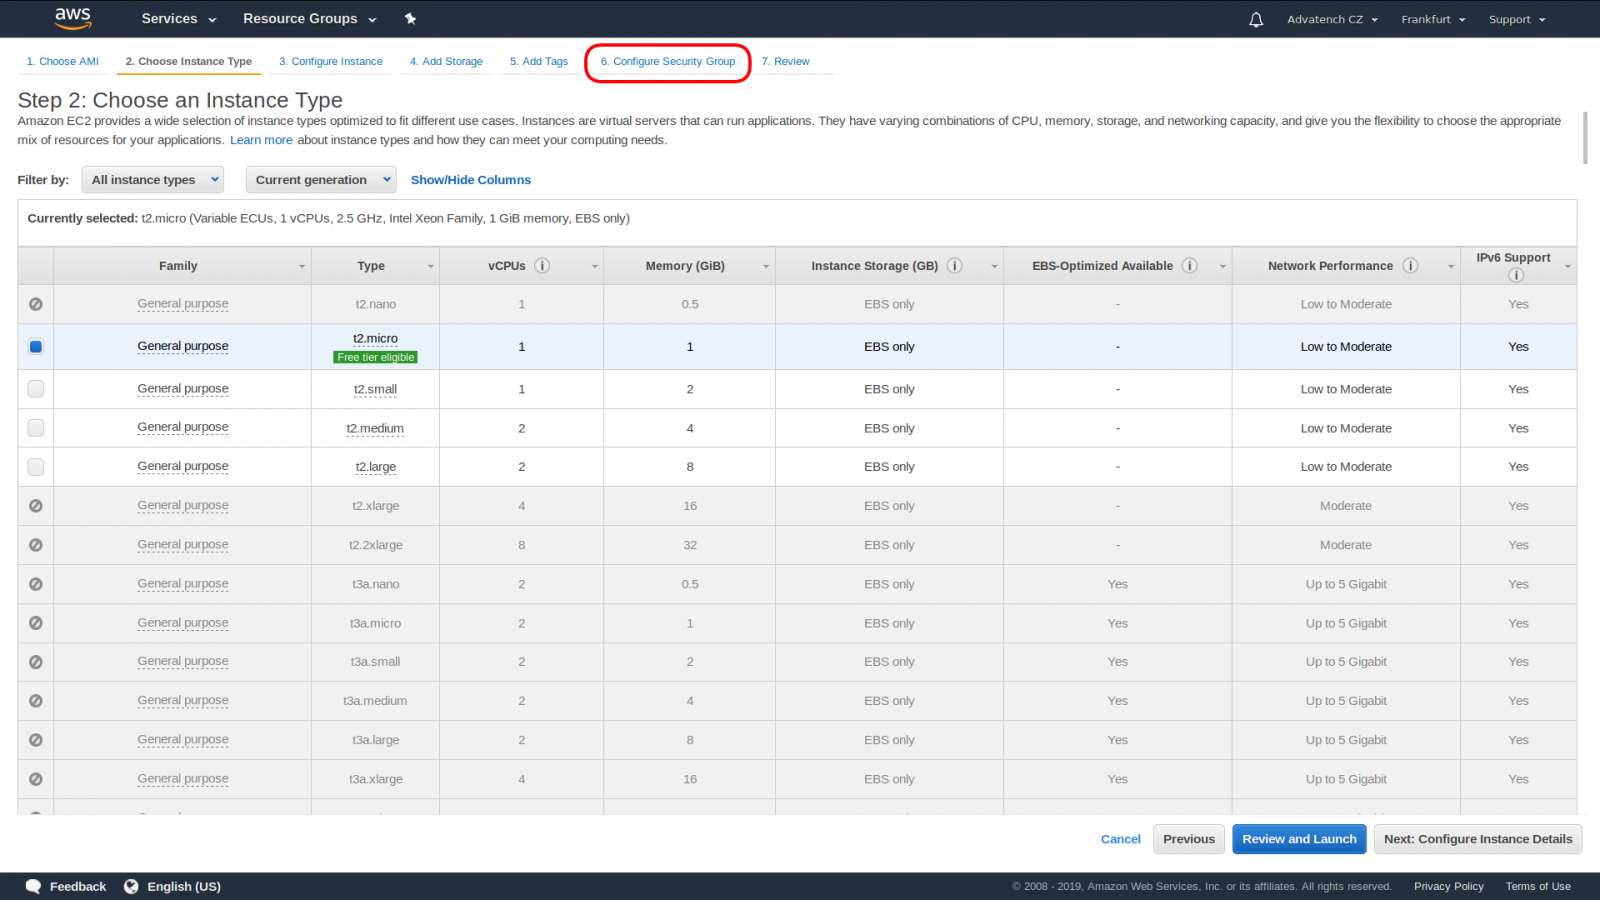
The Instance type suggested in next step, t2.micro, is quite okay for running the Free version of the product (in fact, it is sufficient for production use as well while the number of routers stays low). But because the routers need to be able to connect to the server, you need to configure the so-called Security Groups. Therefore, click on "6. Configure Security Group" as shown in the next picture:
At the security groups screen, you should add rules to allow several port and port ranges, according to the instructions.
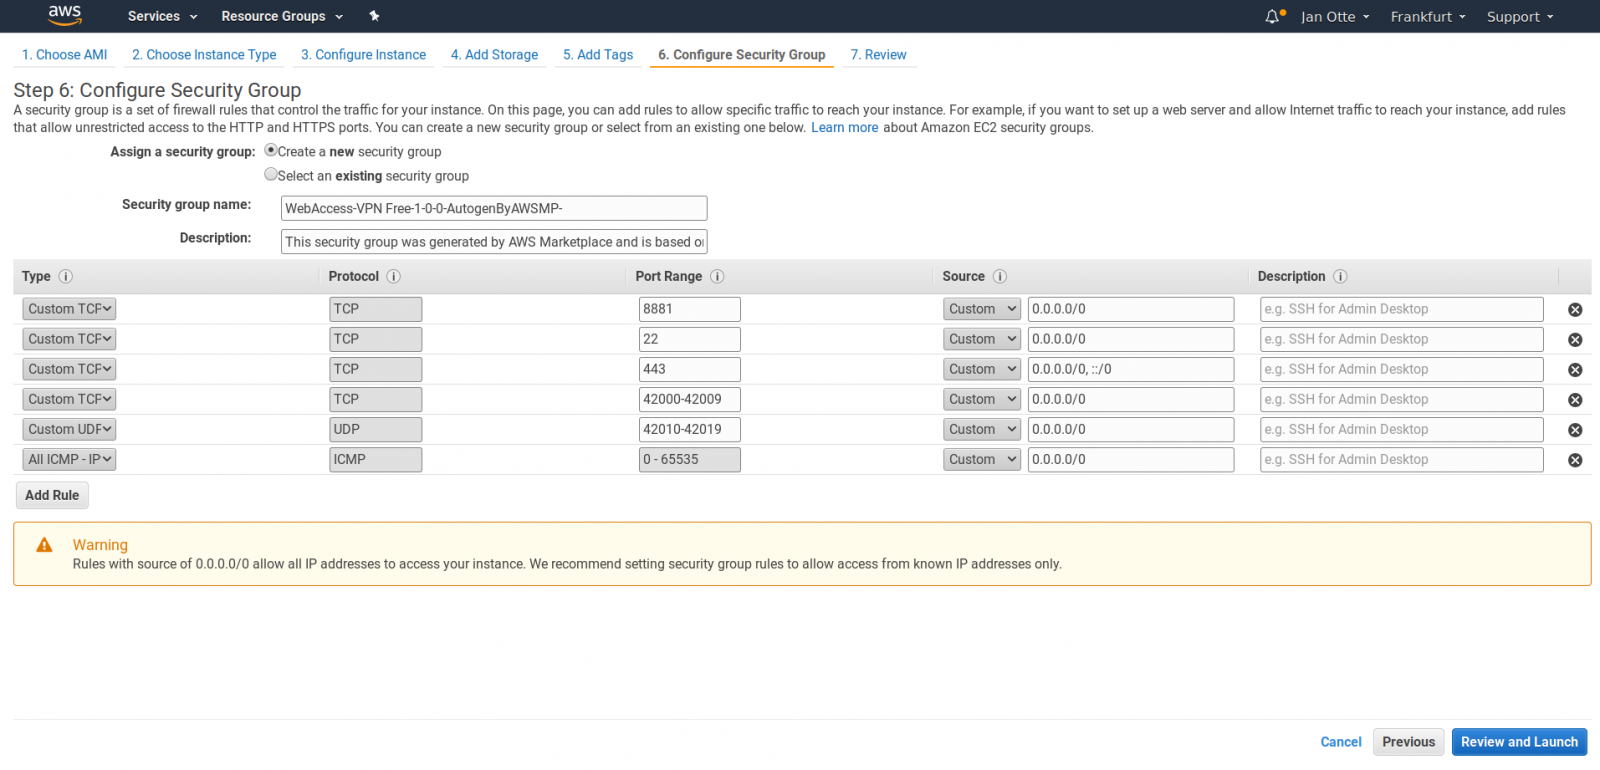
Basically, you need to open these ports:
TCP - 22, 443, 8881, 42000-42009
UDP - 42010-42019
ICMP
The resulting screen may look like the one above.
Afterwards you click on "Review and Launch" followed by "Launch".
Note that after clicking on Launch, you may be asked to create a keypair (if you haven't done that already when running other images on Amazon EC2). Download the keypair and click on "Launch Instances".
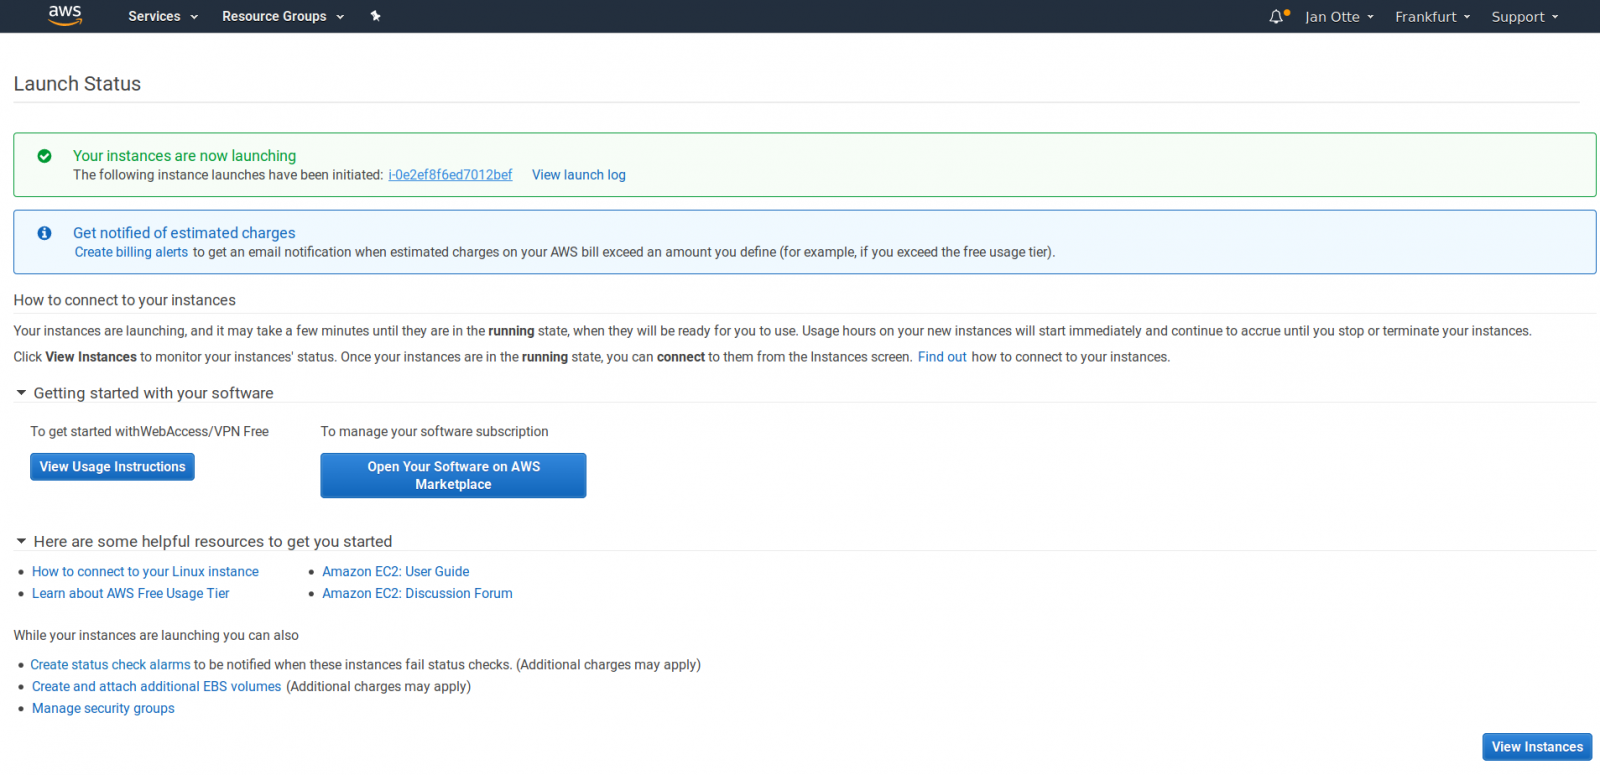
Once the instance is launched you will be redirected to "Launch Status" page. From here you could continue by clicking on the first link (the alphanumerical instance identifier) or View Instances on bottom right.
Connecting to SW setup wizard
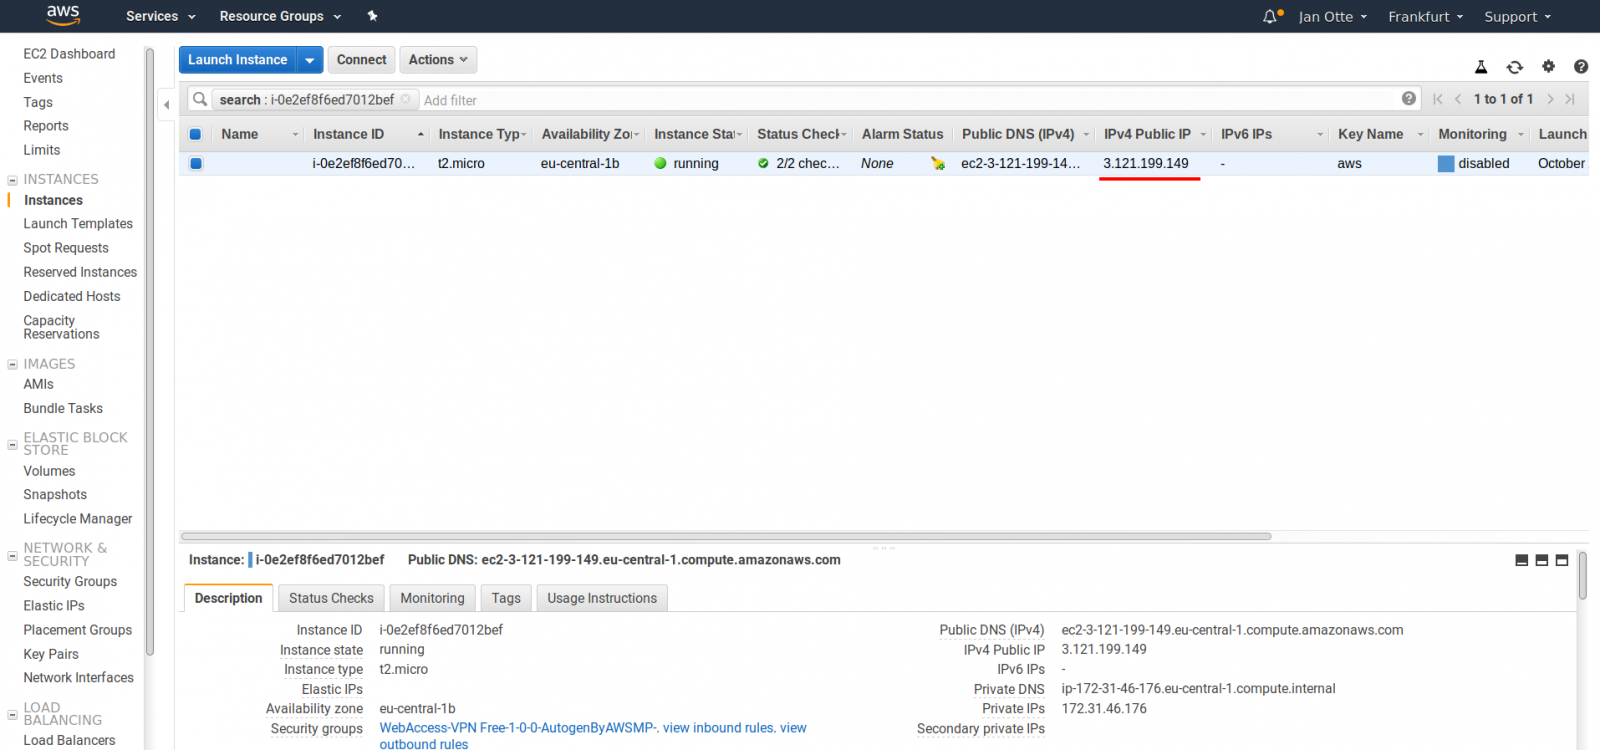
Installation wizard
You will see the installation wizard of the software that will guide you through the security setup (generating or importing certificate), network settings, domain setup, password setup and EULA acknowledgement. More details about the wizard can be found in the documentation - you can safely jump to chapter 2 (Installation), point 13.
The instance will start the SW installation and once complete (a few minutes on t2.micro instance type) the "Go to login" button will become active.
Logging into your server
After providing a username (admin) and password you have enetered during the installation wizard, you can enter the product GUI and try experimenting with it.
The product itself is able to do quite a few number of things. We will dive into the basic and more advanced use within other blog posts. At this moment I would like to point out a few things:
You can add any of our v2 or v3 routers in the system. You can find the required router User Modules in Administration->Application under Router Modules. (manual, chapter "3. Configuration of Advantech Router")
To plug some routers in the system, you need to install a UM onto the routers, validate them AND assign them into at least one network (manual, chapter "3. Configuration of Advantech Router")
To plug standalone clients (Notebook, SCADA, Smartphone) to the system, you need to create a .ovpn configuration for them. (manual, chapter "4.7 Standalone VPN Clients")
You should have a quick look in the manual to understand how does the various interface modes allow/ban devices connected to the routers enter the "network of networks" (manual, chapter "4. WebAccess/VPN User Interface"
The Free version of the product has a limitation of 5 routers and 2 standalone clients and it can not be be upgraded. It If you are interested in running WebAccess/VPN in production, please contact your business representative.
The tool is quite new. We are going to grow it. If you have a suggestion or requirement, don't hesitate to put a comment here or contact your business representative.