Manage Users
This chapter provides a comprehensive guide to user management on the router. It explains the differences between user roles and details how to create, modify, and delete accounts. Additionally, it covers the configuration of advanced security features such as Two-Factor Authentication (2FA) and passwordless SSH login.
The primary administration page is Administration → Manage Users, which is fully accessible to users with the Admin role. Users with the standard User role have restricted access and can only modify their own settings via the separate Administration → Modify User page; refer to Modify User.
Warning
Be careful not to lock out or delete all users with the Admin role. If this happens, no user will have the necessary permissions to manage accounts, and a factory reset may be required.
Info
- The main Manage Users page is only accessible to users with the Admin role.
- For global authentication settings, such as enabling 2FA services and setting password complexity rules, refer to Authentication.
The Manage Users page is the central hub for creating, modifying, and deleting user accounts on the router. In the figure below, you can see that there are two existing users, root and Alice, and we are about to add a new user named John with the Admin role.

User Roles and Permissions
The router supports two primary user roles, each with a different level of permissions:
- User Role: Intended for basic monitoring. Users with this role have read-only access to most of the web interface and cannot make configuration changes (except for modifying their own account). Console access is disabled.
- Admin Role: Intended for full device management. Administrators have full read-write access to the entire web interface and can log in via the console. However, this is not equivalent to the
rootsuperuser on a standard Linux system.
Info
In addition to the primary roles, the system includes a highly restricted Operator Role. Users with this role can only log in and change their own password, with no other capabilities or access to the web interface. This role is intended solely for special-purpose Router Apps and future high-granularity access rights configurations.
Adding, Modifying, and Deleting Users
The main part of the page lists all existing users. For each user, you have three available actions:
| Button | Description |
|---|---|
| Lock | Temporarily disables the user account, preventing login via both the web interface and the console. |
| Modify | Opens the Modify User page, allowing you to change the password, update contact information, or manage security settings like the SSH public key and 2FA; refer to Modify User. |
| Delete | Permanently removes the user account from the router. |
To create a new account, fill out the form shown in the figure above and click the Add User button.
Item | Description |
|---|---|
| Role | Assigns the user role. Available options are Admin, User, and the highly restricted Operator role. |
| Username | The name for the new user account. |
| New Password | Sets the password for the user. It must always comply with the rules defined by the Force Password Complexity setting (see Authentication). When changing a password for an existing user, the new password is also checked against the previous password and must meet these additional requirements: • Character Difference: Must differ from the old password by at least 1 character (Very Weak / Weak levels) or at least 5 characters (Good / Strong levels). • No Trivial Variations: Changing only the case of letters or cyclically shifting characters is not allowed. |
| Confirm Password | Re-enter the new password to confirm it. This helps prevent typos. |
| Public key | Paste a public SSH key here to enable passwordless console login for this user. The maximum supported size is 16 KiB. Refer to Passwordless Console Login for a detailed guide. |
| Phone Number | The user's mobile phone number. If provided, an SMS notification will be sent to this number whenever the user's password is changed. Note: This feature is only available on cellular router models. |
| Email Address | The user's email address. If provided, an email notification will be sent to this address whenever the user's password is changed. Note: This feature requires a functional SMTP server configuration. |
Modify User
Info
The Administration → Modify User page is only accessible to users with the User role.
The Administration → Modify User page allows users to edit their own configuration settings. While a standard user is restricted to this page, a user with the Admin role can modify all user accounts via the Administration → Manage Users page, as described in Manage Users.
The figure below shows an example of the Administration → Modify User configuration page, illustrating a case where a user with the User role is logged in and does not have access to the Administration → Manage Users page.
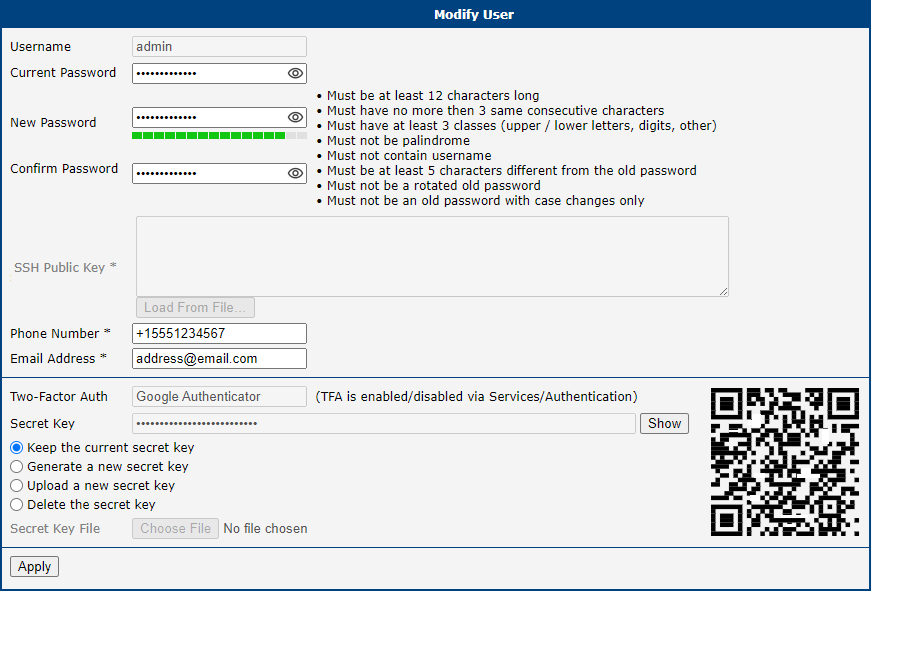
Most items are already described in Manage Users. If the user wants to change their password, they must enter their original password into the Current Password field. The SSH Public Key field is disabled here because users with the User role are not permitted to log in via the console. In addition to the password, the user can also change their phone number and email address. In the last section of the screen, the user can modify their Two-Factor Authentication settings; for details, see Two-Factor Authentication.
Two-Factor Authentication
Caution
- Correct time is crucial: Two-factor authentication is time-based. Ensure the router's clock is always accurate by enabling the NTP client; see NTP.
- Risk of lockout: An incorrect 2FA setup can lock you out of your account. It is highly recommended to have a separate admin account without 2FA as a backup during the setup process.
- Secret key is vital: Without the secret key, you cannot complete the setup or log in. A user with the Admin role cannot retrieve a secret key for another user; they can only delete it.
- Secret key deletion: If a user is unable to log in using 2FA for any reason, a user with the Admin role can delete their secret key, thereby disabling 2FA for that user.
Tips
A user with the Admin role cannot generate or upload the secret key for another user; they can only delete the key.
If you have enabled one of the two-factor authentication services, as mentioned above, you should see the chosen service name in the Two-Factor Auth field, as shown in the figure above.
A secret key is required to activate the two-factor authentication. You can generate this key by choosing the Generate a new secret key option. You can upload the user's secret key from a file using Upload a new secret key. Clicking the Apply button the secret key will be saved. Next, click the Show button, located to the right of the secret key, the secret key will be shown. If the secret key is defined, a QR code will appear on the right, allowing you to easily add this key to the chosen authentication application by scanning it.
Implementation Notes
- Two different two-factor implementations are supported:
- Implemented for the following services only:
- The router's web server login
- SSH login
- TELNET login
- Two-factor authentication is disabled by default
- Two-factor authentication data are backed up/restored during user backup/restore
- All private two-factor authentication data are removed when the corresponding user is deleted
- No internet or mobile connection is required to use two-factor authentication, but keep in mind the need to synchronize the system time
Configuration Steps
- Enable the two-factor authentication service as described in the Authentication.
- Enable the two-factor authentication for a user as described in the Modify User section.
- Use an application or service to perform the two-factor authentication to the router as described in the following section.
Authenticator
To log in with two-factor authentication, you need an Authenticator application. Both Google Authenticator and OATH use TOTP (Time-based One-Time Password, RFC 6238) mode by default. You can use any compatible authenticator. For information about authenticator usage, see the corresponding manual.
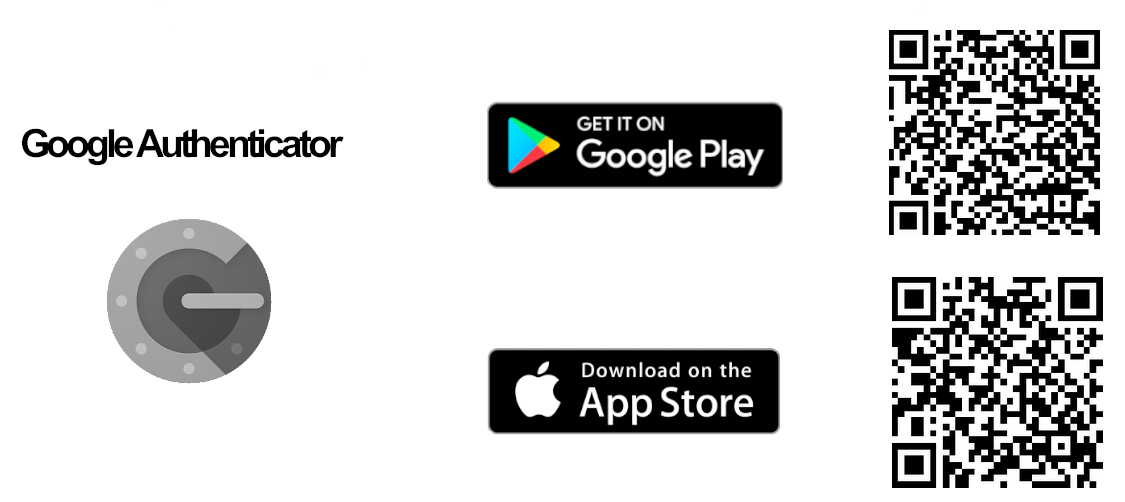
You can use the Google Authenticator application; see the figure below for the download links.
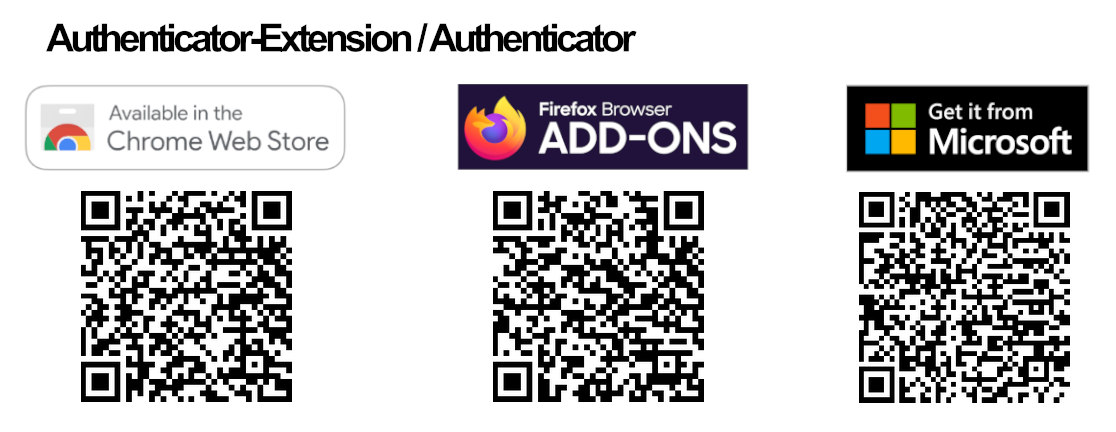
Authenticator-Extension is available as an extension for all popular browsers; see the figure below for the download links.
In an Authenticator application, you can create a new entry by entering the secret key you have noted down or by scanning the QR code shown for the user on the Modify User configuration page.
Router Web Login
When logging into the router's web interface, enter the Username and Password as you would for a standard login; see the figure below.

Next, you will be prompted to enter the Verification Code; see the figure below. This code is obtained from your Authenticator. Note that there is a limited time for code usage, typically within five minutes, assuming the system time is correct.
After entering the correct code, you will be successfully logged in to the router's web interface.
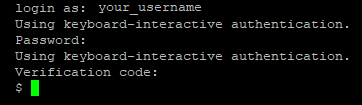
SSH and Telnet Login
Logging into SSH and Telnet with two-factor authentication is similar. Enter your username, password, and the generated verification code. For an example of SSH login, see the figure below.
Passwordless Console Login
You can log in to SSH without a password using an SSH Public Key. This chapter demonstrates the key generation and connection process using PuTTY, a free terminal emulator for Windows OS available at PuTTY.
Installation Notes
- For simplicity, this guide details a manual installation of PuTTY to the directory
C:\bin, instead of using an.msiinstallation package. - From the PuTTY application download page, locate the Alternative binary files section and download
putty.exe,puttygen.exe, andpageant.exe. The 64-bit x86 version is generally recommended. This guide uses PuTTY version 0.80. Save these files to theC:\bindirectory.
Generate Keys
- Run the downloaded
puttygen.exeapplication to create your SSH key, as shown in the figure below. - Ensure the RSA option is selected.
- Click the Generate button. Move your mouse randomly within the window to generate the keys.
- Once complete, the key data will appear in the window.
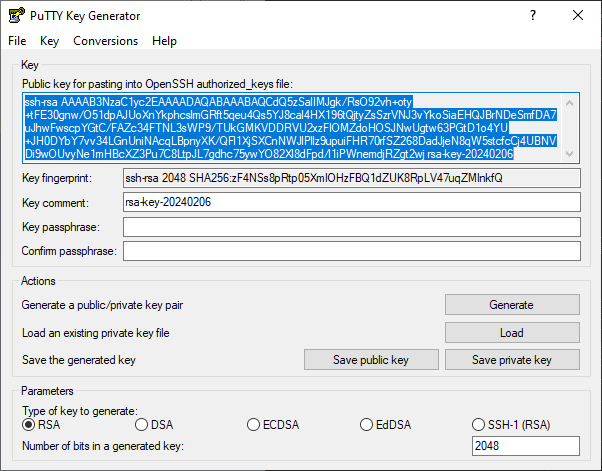
- Click both Save public key and Save private key buttons to save these keys on your computer:
- Name the public key hostpublickey and the private key hostprivatekey. Do not manually add any file extensions.
- If prompted about a passphrase, click Yes to save without a passphrase. Using a passphrase adds security, but this guide proceeds without one for simplicity.
- Leave the PuTTY Key Generator application open.
Uploading Public Key to the Router
- In the router GUI (Administration -> Manage Users), click the Modify button for the user to whom you want to add the public key. Ensure the user has the Admin role; SSH login is not permitted for users with the User role.
- Enter the generated public key for the user:
- In the PuTTY Key Generator, select the entire public key (the data within the text box) and copy it to the clipboard.
- In the router GUI, paste the key into the SSH Public Key field.
- It is important that the key starts with "ssh-rsa " followed by the key itself. If the key is not properly recognized, the SSH login will fail.
- Save the user settings by clicking the Apply button.
- You can now close the PuTTY Key Generator application.
Caution
If you have a public key generated previously and want to copy it to the router, the easiest way is to open the key file in the PuTTY Key Generator application and copy it from there. If you attempt to copy it directly from a file or from the GUI of another router, the key may not be in the correct format, and authentication will fail.
PuTTY Session Configuration
- Open the
c:\bin\putty.exeapplication. - In the configuration window, navigate to Connection -> Data and enter the username (the router's user to whom the public key was saved) in the Auto-login username field.
- Under Connection -> SSH -> Auth -> Credentials, click the Browse button near the Private key file for authentication field, and select your hostprivatekey file generated earlier.
- In the configuration window, navigate to the Session menu item and configure the following:
- Host Name: IP address of your router.
- Port: 22.
- Connection Type: SSH.
- Saved Session: Enter a name for this session.
- Click Save to store these session settings.
Connecting to the Router
- Open the
c:\bin\putty.exeapplication. - Select your session and click the Load button.
- Click Open to establish the connection.
- If everything is configured correctly, an SSH console prompt will open with the user automatically logged in.
Forced Password Change
If a user is required to change their password, the prompt appears upon login, whether accessing the system via the web interface or the console environment. The password change is required in the following situations:
- When logging into a new router for the first time.
- When the user's password has expired after the Expire Password After period; see Authentication.
- When an Admin-role user has forcefully changed the password.
- When a Configuration Reset or Factory Reset is performed on the router; see Reset.
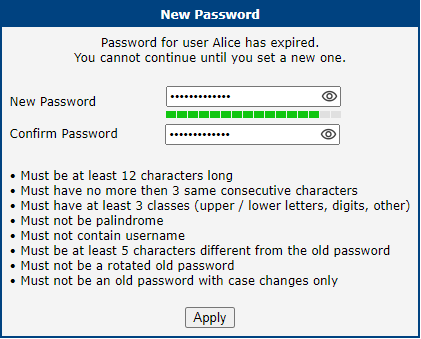
The dialog for entering a new password is shown in figure below. The new password must comply with the rules stated in the GUI, which depend on the Force Password Complexity level set in Configuration → Services → Authentication, as described in Authentication.
Change Profile
Advantech routers allow you to store up to four complete sets of configurations, known as profiles: one Standard Profile and three Alternative Profiles (alt1, alt2, alt3). This feature is particularly useful for switching between different operational modes, such as changing mobile provider settings, activating different VPN tunnels, or modifying firewall rules based on location or time.
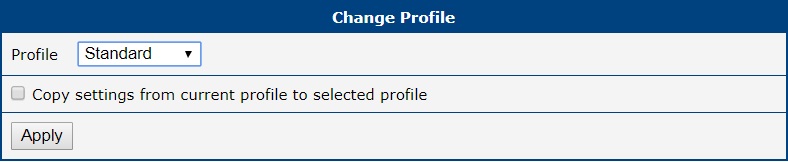
The Administration → Change Profile page serves two main purposes: saving the router's current running configuration into a specific profile, and switching the router to use a different profile.
Item | Description |
|---|---|
| Profile | Chooses the configuration profile that the router will load and use after the next reboot. |
| Copy settings from current profile to selected profile | When this box is checked, clicking Apply will save the router's current running configuration into the profile selected above. The router will not switch to this profile; it only saves the settings. |
Warning
Any change made on this page, whether switching a profile or saving one, takes effect only after the router is rebooted.
You can switch the active profile using several methods:
- Web Interface: Select the desired profile from the Select profile to switch to dropdown and click Apply. Then, reboot the router.
- SMS Command: Send an SMS with the text
set profile [std|alt1|alt2|alt3]to the router. This change is permanent and will be used after the next reboot. This is configured on the Configuration → Services → SMS page.
Set Date and Time
Warning
This page is for a one-time manual setting of the router's clock. For continuous time synchronization, you must configure the NTP client. See NTP for details.
Info
Please note that some of the options described below may not be available on all router models.
This page offers several methods for setting the system date and time.
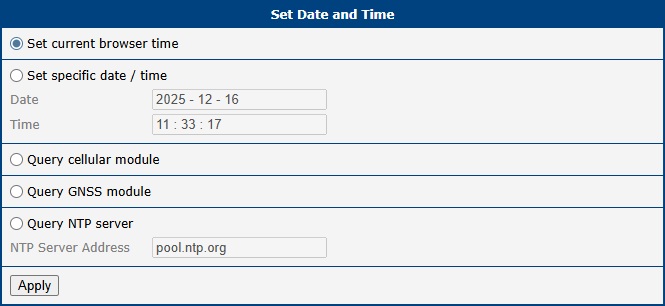
- Set current browser time: Synchronizes the router's clock with the time on your computer.
- Set specific date/time: Allows you to manually enter a specific date and time. Use the format
yyyy-mm-ddfor the date andHH:MM:SSfor the time. - Query cellular module: Retrieves the time from the mobile network using the NITZ standard. This requires an active cellular connection and support from both the mobile operator and the router's cellular module.
- Query GNSS module: On routers equipped with a GNSS module, this option sets the time based on satellite data. The GNSS receiver must be enabled and have a valid position fix.
- Query NTP server: Performs a one-time synchronization with a specified NTP server. You can enter the server's IP address (IPv4 or IPv6) or its domain name.
Manage SIM
The Administration → Manage SIM menu provides tools for managing the security and settings of your SIM cards.
Unlock SIM
If your SIM card is protected by a Personal Identification Number (PIN), you must first enter it on the Mobile WAN configuration page to establish a connection. This page, however, allows you to permanently remove the PIN protection from the SIM card so it will no longer be required upon startup.
To remove the PIN, navigate to Administration → Manage SIM → Unlock SIM. The page displays the SIM Card (1st or 2nd) that is currently active within the system, along with its unique IMSI number. This ensures you are unlocking the correct card. Note that this operation can only be performed on a SIM card that is currently detected by the system. To proceed, enter the correct 4–8 digit PIN into the SIM PIN field and click Apply.
Warning
The SIM card will be blocked after three incorrect PIN entry attempts. To unblock it, you will need the PUK code, as described in the next section.

Unblock SIM
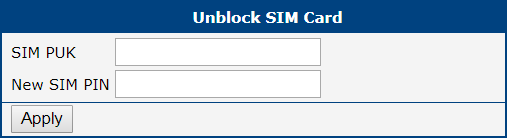
This page allows you to unblock a SIM card that has been locked due to three incorrect PIN attempts. You can also use this page to set a new PIN by utilizing the PUK code.
To unblock the card, navigate to Administration → Manage SIM → Unblock SIM. The page displays the SIM Card (1st or 2nd) that is currently active within the system, along with its unique IMSI number. This ensures you are unblocking the correct card. Note that this operation can only be performed on a SIM card that is currently detected by the system.
To proceed, enter the PUK (Personal Unblocking Key) code provided by your carrier into the SIM PUK field, and specify your desired new PIN in the New SIM PIN field. Click Apply to confirm the changes.
Warning
The SIM card will be permanently blocked if the PUK code is entered incorrectly too many times (typically ten attempts).
Set SMS Center
This page allows you to manually set the phone number for the SMS Service Center (SMSC), which is essential for sending SMS messages from the router. To access this page, navigate to Administration → Manage SIM → Set SMS Center.
The currently configured SMSC number can be viewed at any time on the Status → Mobile WAN page.
Info
In most cases, the SMSC number is automatically provisioned by the SIM card, and you do not need to change this setting. You should only set this value manually if you are experiencing issues sending SMS messages and your mobile network operator has provided a specific number to use. The number can be entered in a local format or with a full international prefix (e.g., +420123456789).

Switch SIM
The Switch SIM page allows for manual switching between SIM cards. This is primarily used for maintenance or testing purposes to force the router to a specific SIM slot, bypassing the automatic selection logic temporarily.
Info
To enable manual SIM switching, you must first deactivate the mobile connection. Navigate to Configuration → Mobile WAN and uncheck the Create connection to mobile network checkbox. If this is not done, the SIM Card selection will be disabled with a message "Disable connection to mobile network first" displayed.
To switch the active SIM card, navigate to Administration → Manage SIM → Switch SIM.

Select the desired SIM card from the SIM Card drop-down list and click Apply. Each option includes the slot number and the IMSI number for precise identification.
Warning
The manual selection made on this page is temporary. Once you re-enable the mobile connection in Configuration → Mobile WAN, the router will automatically select the active SIM card based on the rules and priorities defined in the Mobile WAN configuration, potentially overriding your manual selection.
Send SMS
You can send an SMS message directly from the router to test cellular functionality or send a quick notification. To do so, use the Send SMS dialog in the Administration menu.
Enter the recipient's Phone number, type your message in the Message field, and click Send. By default, the router limits SMS messages to 160 characters. To send longer messages, you must install the PDU SMS Router App.

It is also possible to send SMS messages programmatically via a CGI script. For detailed instructions, please refer to the
Command Line Interface for S1 application note.
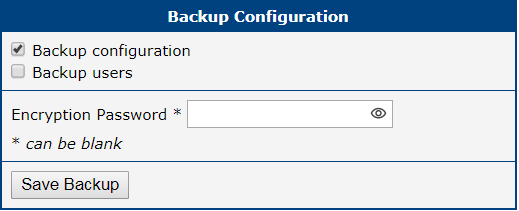
Backup Configuration
The Administration → Backup Configuration page allows you to save the router's current configuration settings to a file. This backup file can be used later to restore the router to a previous state or to clone the configuration to other devices.
| Item | Description |
|---|---|
| Backup Configuration | When checked, the backup will include all router configuration settings. |
| Backup Users | When checked, the backup will include all user accounts and their passwords. |
| Encryption Password | If you set a password here, the backup file will be encrypted. If left blank, the file will be saved unencrypted. |
Warning
Configuration backups can contain sensitive information, including user credentials. It is strongly recommended to always set an encryption password to protect the backup file. Also, ensure you are downloading the backup file over a secure (HTTPS) connection.
After selecting the desired options, click the Apply button. Your web browser will then prompt you to save the configuration file (with a .cfg extension). For instructions on how to use this file, see Restore Configuration.
Restore Configuration
The Restore Configuration menu contains options for reverting the router's settings to a previous state or resetting them entirely. It is divided into two sub-menus: Restore from File and Factory Reset.
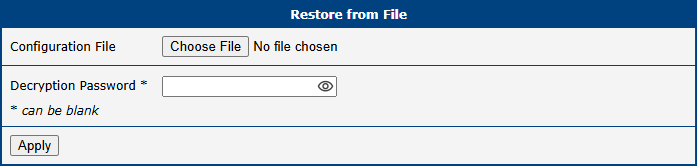
Restore from File
This page allows you to restore the router's settings from a previously created backup file. For instructions on creating a backup, please see Backup Configuration.
To restore a configuration, navigate to Administration → Restore Configuration → Restore from File. Click the Choose File button to select the .cfg backup file from your computer. If the file is encrypted, you must provide the correct password in the Decryption Password field. Clicking the Apply button will upload the file, apply the settings, and reboot the router.
Warning
Restoring a configuration from firmware older than version 6.2.0 is not supported. While upgrading the firmware from an older version is possible, attempting to restore a configuration file from such versions will result in some settings being reset to their factory defaults.
Caution
Restoring a configuration file created on a non-S1 router to an S1 router (or vice versa) may result in the loss of some settings due to hardware and feature differences.
| Item | Description |
|---|---|
| Configuration File | Select the .cfg backup file from your local computer. |
| Decryption Password | The password required to decrypt an encrypted backup file. Leave blank if the file is not encrypted. |
Factory Reset
Warning
Factory reset is a destructive action that completely erases all configuration and restores the router to its original factory state. This action is irreversible and should be used with extreme caution.
Key consequences of performing a factory reset include:
- All custom configurations (including network, VPN, and firewall rules) will be permanently deleted.
- All user accounts will be erased, leaving only the default administrator account.
- The router's LAN IP address will revert to its factory default (typically
192.168.1.1), which will likely disconnect you from the web interface.
This software reset is equivalent to a hardware factory reset using the RST button, as detailed in Reset.
To reset the router to its default factory settings, navigate to Administration → Restore Configuration → Factory Reset.
Clicking the Reset and Reboot button will erase all custom configurations, apply the factory default settings, and automatically restart the device. The reboot process typically takes about 30 seconds to complete.

Update Firmware
Keeping your router's firmware up to date is crucial for security and access to the latest features. This page allows you to view the current firmware version and perform updates.
Info
The latest official firmware for your router is always available on the Advantech Engineering Portal at icr.advantech.com/download/routers-firmware.
Warning
- For security reasons, always use the latest firmware version. Do not downgrade to a version older than the one the router was manufactured with, and never upload firmware designed for a different router model, as this can cause irreversible damage.
- Firmware updates can occasionally affect Router App compatibility. It is recommended to update all Router Apps at the same time as the firmware.
- If you are using an unsecured HTTP connection, some firewalls may block the firmware upload. In such cases, switch to HTTPS or contact your network administrator.
The Administration → Update Firmware page is divided into sections for viewing the current version and performing manual or online updates.
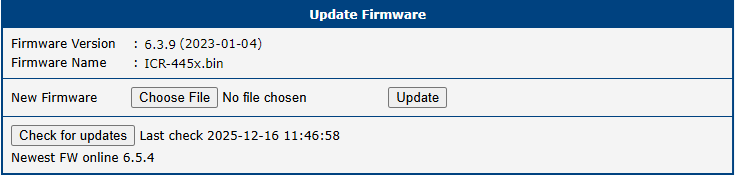
Manual Firmware Update
To manually update the router's firmware, click the Choose File button and select the firmware file. Then, press the Update button to initiate the firmware update process.
Online Firmware Update
Starting with firmware version 6.4.0, the firmware can be updated from a public server.
To check for a newer version, click the Check for updates button. If a new version is available, the version information and a Download and Update button will appear. Clicking this button will automatically download the new firmware and initiate the update process.
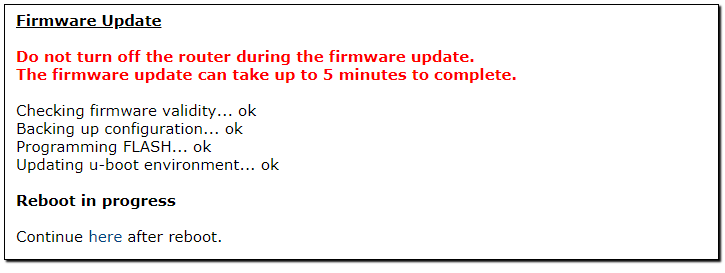
During the update, the router will display its progress, as shown in the figure below. Once the update is finished, the router will automatically reboot. After it comes back online, click the provided here link to return to the web interface.
Reboot
The Reboot menu provides two different options to restart or schedule automatic restarts of the router. To access these options, select the Reboot item in the Administration menu.
Info
- Starting with firmware version 6.6.0, the reboot functionality is integrated directly into the router's base firmware and replaces the legacy Daily Reboot Router App.
- To prevent conflicts, you must disable or uninstall the legacy Router App before using the integrated firmware feature.
Reboot Now
This submenu allows you to immediately reboot the router by clicking the Reboot button. A standard reboot takes approximately 30 seconds to complete.

Reboot Schedule
The Reboot Schedule submenu allows scheduled, automatic restarting of the router. The following parameters can be configured:
Item | Description |
|---|---|
| Enable scheduled reboot | Activates or deactivates periodic router restarts according to the selected schedule. |
| Week Days | Select specific days of the week (Monday–Sunday) for the scheduled reboot. Multiple days can be selected. |
| Time | Set the exact time for the reboot to occur on the chosen days (format: hh:mm). |
| Minimum Uptime | The minimum amount of time the router must be running before a scheduled reboot is permitted. This prevents reboot loops (e.g., during unstable power conditions). Range: 10–43,200 minutes. |
| Maximum Uptime | (Optional) Triggers an automatic reboot once the router's continuous uptime reaches this specified value. This is often used to ensure long-term system stability. If left blank, no reboot is triggered based on maximum uptime (range: 10–43,200 minutes). |

Logout
Clicking the Logout item in the main menu immediately terminates your session and logs you out of the router's web interface. You will be redirected to the login page.
Info
For security reasons, it is always recommended to log out when you have finished configuring the router, especially when accessing it from a shared or public computer.