Captive Portal
Captive Portal is a service designed for routers functioning as a standard Wi-Fi hotspot or as a router in a LAN. Every customer using this network is redirected to a special web page before gaining Internet access. The page may contain an authentication form or an information notice. If authentication is required, the customer gains access after entering the correct credentials. Redirection occurs only on the first Internet access attempt.
Captive Portal is typically used on public-access networks (free Wi-Fi hotspots) that require customers to interact with a page before being granted network access. Customers must first contact the operator to obtain authentication credentials. The Router App can also be used to present terms of network usage or to display advertising banners and notifications.
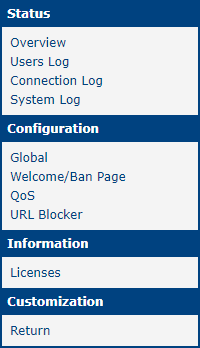
Access the Router App's web interface by clicking the Router App name on the Router Apps page of the router's web interface. The left panel contains the menu with pages for monitoring (Status), Configuration, Information, and Customization. The Customization block contains only the Return item, which switches back to the router's main web interface. The main menu is shown in the figure below.
Module Configuration
Configure the Captive Portal Router App on the Global, Welcome/Ban Page, and QoS pages in the Configuration section of the Router App's web interface.
Global
The first item, Enable Captive Portal service, activates the module. Public interface specifies which interface is used for client connections (wlan0/wlan02 for a Wi-Fi AP, eth0 for an Ethernet interface, or a combination).
Warning
Multi SSID functionality (one Wi-Fi device with multiple SSIDs) is compatible only with firmware 6.3.0 or later.
Enable Exception allows using the Captive Portal on an external Wi-Fi access point via the eth0 interface. When the MAC and IP address of the access point are specified, the router establishes a communication path outside the Captive Portal. This option is only available when eth0 (or a combination including eth0) is selected as the public interface.
Enabling the Welcome/Ban page checkbox activates settings for the welcome and ban pages. The connection mode can be set to Reverse Proxy or Redirect:
- Reverse Proxy — Used for redirecting to an
httpweb page that may contain an active form (agreement, login, etc.). The internal HTTP server acts as a proxy and forwards all requests to the external HTTP server. Only access to the specified domain is permitted. Dynamic content can be implemented using Server Side Includes (SSI) or CGI. - Redirect — Required for redirecting to an
httpspage. Pages with active forms cannot be used in this mode. A static web page with automatic redirection is typically used.
Caution
Some Android devices close the welcome page immediately once the Internet is reachable. When redirect mode is used, the welcome page may appear for only a very short time. Reverse proxy mode is generally preferred for the welcome page.
The Welcome Page URL and Ban Page URL fields specify the URL addresses for the welcome and ban pages. Clients are redirected to these pages on first Internet access or when banned. URLs must be in the format http://full.domain.name. If a URL is not specified, internal pages are used instead. The expected index files are index.(s)html and ban.(s)html. The router searches for the index page in the following order:
- USB flash disk — Preferred location. If a
captive_portalsubdirectory with an index file exists in the flash disk root directory, that file is used. The flash disk is mounted automatically when the service starts. - Router filesystem — If no USB flash disk is available, the internal router filesystem is used. Only approximately 300 kB of disk space is available.
- Default page — If no index file is found on the USB flash disk or router filesystem, the built-in default page is used. It is simple and cannot be modified.
Customer authentication before Internet access can be enabled using the Require authentication checkbox. If enabled, set credentials using the Username and Password fields. This authentication is meaningful only when the internal welcome page is used (i.e., Welcome Page URL is blank). When an external welcome page is used, authentication can be implemented on the remote HTTP server and disabled here. Instructions for creating a page with an authentication form are provided in the How to Create Own Welcome Page section.
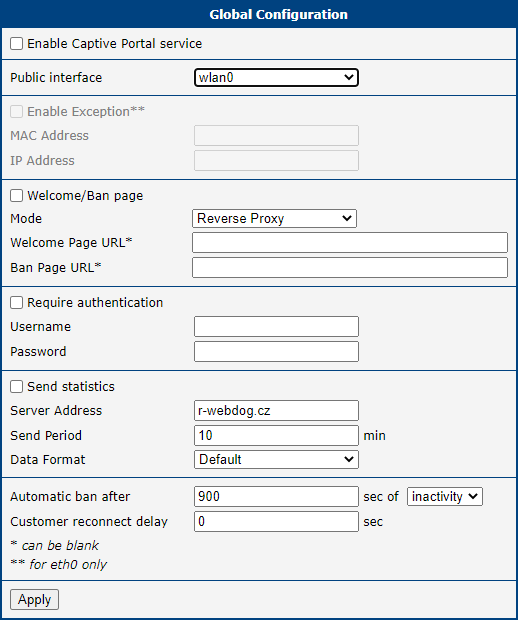
The next section configures the sending of statistical data to a selected server. Enable it with the Send statistics checkbox and specify the Server Address. The Send Period and Data Format can also be configured. When Data Format is set to Extended, the AP MAC and AP IP addresses are included in the POST request.
Statistical data are sent via HTTPS using the POST method, divided into three messages: cust-list (connected customers), domain-list (visited domains), and utilization-list (used services). These messages are described in detail in the Attachment A section.
The last part of the Global configuration form provides the Automatic disconnect after option. Customers are automatically disconnected when the specified time expires. Two disconnection modes are available:
- Inactivity — Disconnection occurs if no data is transferred to or from the customer for the specified time. Note that background applications may transfer data without customer interaction, resulting in longer connection times.
- Using — The customer is disconnected after the set period, even if data transfer is in progress.
The Customer reconnect delay field allows delaying reconnection after automatic disconnection. During this period, the customer is temporarily banned. A value of zero disables this function, allowing immediate reconnection. Customers are identified by their Wi-Fi MAC address.
Welcome/Ban Page
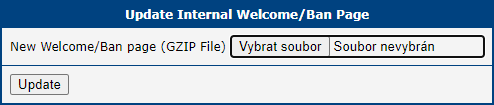
The Welcome/Ban Page configuration form contains a single item: New Welcome/Ban Page (GZIP file). Use the Select file and Update buttons to upload a new welcome and ban page archive. The file must be in TAR/GZIP format. If a USB flash disk is connected, the file is unpacked there; otherwise it is unpacked to the router filesystem.
QoS
The QoS configuration form allows limiting the transfer rate and data volume per customer.
Transfer rate limiting is activated using the Limit transfer rate checkbox:
- Total max. download rate and Total max. upload rate — Maximum transmission rates for the wireless side. Recommended values are approximately 10% below the technology maximum.
- Customer max. download rate and Customer max. upload rate — Maximum download/upload rate for individual customers. The product of this value and the number of simultaneous customers should not exceed the total rate.
The Use predefined values for selector automatically fills the above fields with values for a specific connection technology. Predefined total values are 10% below the technology limit; predefined customer values are calculated for three simultaneous customers. These defaults typically need to be adjusted to suit specific conditions.
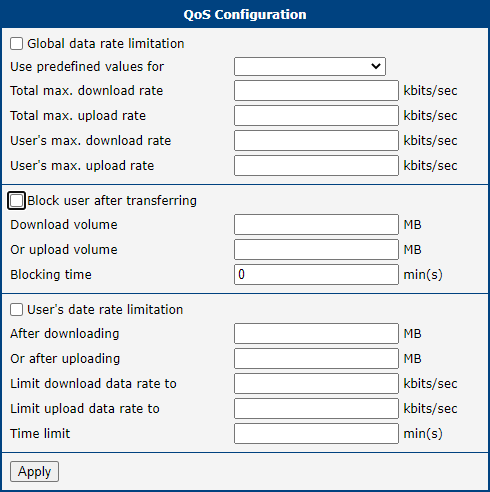
Data volume limiting is activated with the Disconnect customer after transfer checkbox:
- Download volume and Or upload volume — Maximum download/upload data amount per customer. When either limit is reached, the customer's access is blocked for the time specified in the Ban for period field. Only the wireless side is limited; internal Wi-Fi communication is unlimited. Limit checks are performed once per minute.
Speed throttling is activated with the Limit customer's download/upload speed checkbox:
- After download and Or after upload — The amount of data after which the speed is reduced.
- Restrict download speed to and Restrict upload speed to — The reduced speed values.
- Restrict speed for period — The duration of the speed restriction.
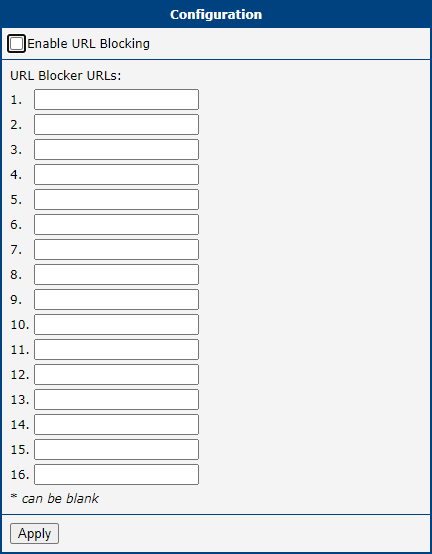
URL Blocker
Enabling Enable URL Blocking allows blocking up to 16 domains, making them inaccessible to customers.
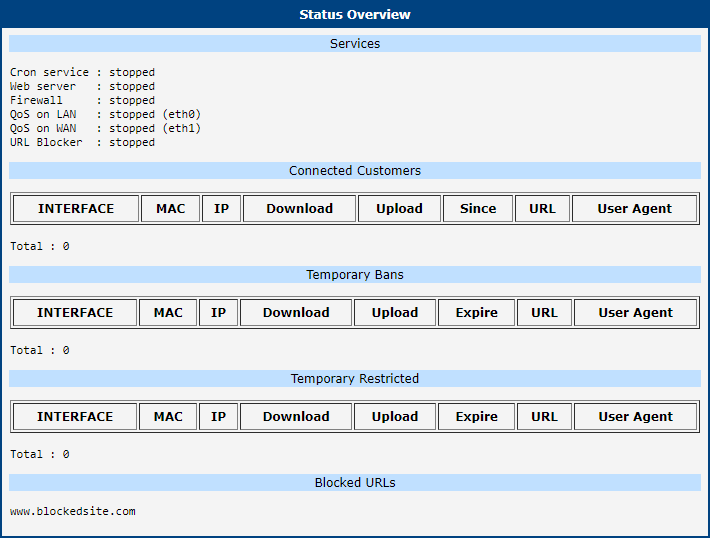
Status Overview
Global Overview
The current status can be viewed by clicking Overview in the main menu of the Router App's web interface. The top of the page lists the available services and their active/inactive state.
| Service | Description |
|---|---|
| Cron service | Automatically runs commands or scripts at scheduled times. |
| Web service | Enables interaction between two machines on a network. |
| Firewall | Manages and secures traffic between networks. |
| QoS on LAN | Manages data flows in the LAN network. |
| QoS on WAN | Manages data flows in the WAN network. |
Available services
Below the services is a table with information about connected customers:
| Parameter | Description |
|---|---|
| MAC | MAC address of the customer. |
| IP | IP address of the customer. |
| Download | Volume of downloaded data. |
| Upload | Volume of uploaded data. |
| Since | Time at which the customer connected. |
| URL | Last requested URL. |
| User agent | Browser name and version, operating system, and other installed components. |
Connected customers
At the end of the Overview page is a table of temporarily banned customers, showing the same parameters as the connected customers table, with Since replaced by Expire, which indicates when the temporary ban expires.
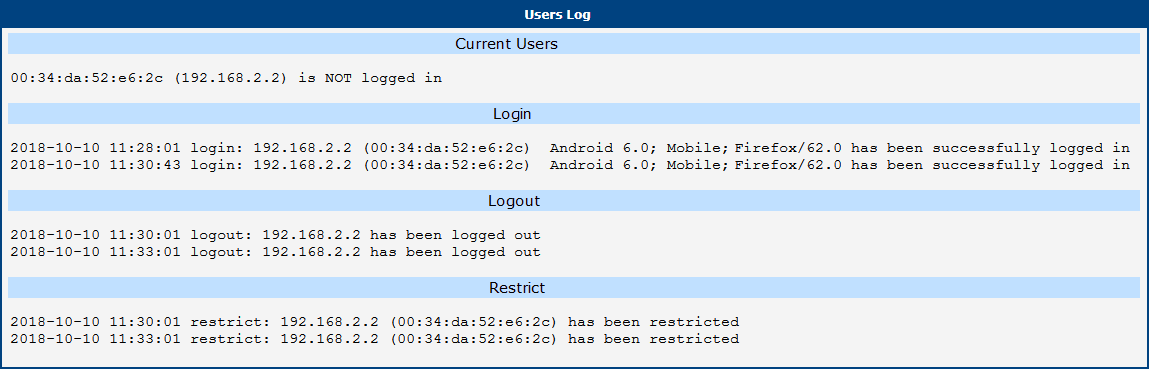
Log Pages
The Users Log page contains the access history of Captive Portal users, including currently logged-in users, login and logout timestamps, and users with restricted access.
The Connection Log page contains the log of the router's internal web server. The System Log page displays the complete router system log.
How to Create Own Welcome Page
The welcome page is displayed to every customer who attempts to access the Internet for the first time. Any URL from the customer's browser is redirected to this page (only HTTP is redirected; HTTPS is blocked entirely during this phase). The page must be named index.shtml or index.html. It must contain a link that grants full Internet access:
<p>You can continue <a href="/captive_portal/index2.sh">here</a>...</p>The internal script /captive_portal/index2.sh grants Internet access for the customer's IP address and redirects the browser to the original URL.
Simple Page
If neither authentication (Require authentication) nor reconnect delay (Customer reconnect delay) is enabled, the customer is redirected to a simple page (index.shtml or index.html). The page may contain any content. The only mandatory element is the link that enables full Internet access — without it, the customer cannot access the Internet directly.
Login Page
If authentication (Require authentication) is enabled, the customer is redirected to login.shtml or login.html. This page must contain a form for entering a username and password. There are two ways to submit authentication data:
- Plain text — Simpler but transmits credentials unencrypted:
/captive_portal/index2.sh?auth_name=user&auth_pass=secret - Hash text — More secure; credentials are transmitted as an MD5 hash:
/captive_portal/index2.sh?auth_hash=a621b9c2130bdf72ebc81aa382eb7309
The hash is calculated as the MD5 sum of salt + username + password, where salt is a randomly generated value accessible server-side via SSI and the CP_AUTH_SALT environment variable.
Ban Page
If reconnect delay (Customer reconnect delay) is enabled and the customer attempts Internet access during the ban period, the customer is redirected to ban.shtml or ban.html. The CP_BAN_LEFT SSI environment variable contains the number of seconds remaining until the ban expires. The ban page should not contain a link to enable Internet access.
Customized Original URL
The Internet access link can be extended with an origin_url parameter to redirect the customer to a specific URL instead of the originally requested one:
/captive_portal/index2.sh?origin_url=http%3A%2F%2Ffull.domain.name%2FControl characters in the parameter value must be URL-encoded. The origin_url parameter must be the last parameter in the URL.
External Welcome/Ban Page
When using an external welcome/ban page, the index2.sh script must still be executed — either after a button press (authentication action) or automatically on each page refresh. Example HTML to call index2.sh from an external page:
<meta http-equiv="refresh" content="1;url=http://127.0.0.1/captive_portal/index2.sh?origin_url=*****">Replace ***** with the URL of your web page.
HTTP GET requests to the external welcome page include the origin URL and client information:
GET /?origin_url=<URL>&client_mac=04:f1:28:XX:XX:XX&client_ip=192.168.3.10
&ap_mac=00:22:88:XX:XX:XX&ap_ip=192.168.3.1&ap_ssid=v3L HTTP/1.1|Host:...
Example
A complete welcome page example is available in WelcomePageExample.tar.gz, downloadable from the Captive Portal page. The example uses SSI for dynamic content and contains the following files:
ban.shtml— Page returned when the customer is temporarily banned.example.jpg— Common image used across all pages.footer.shtml— Common footer included in all pages.header.shtml— Common header included in all pages.index.shtml— Main welcome page for configurations where authentication is not required.login.shtml— Main welcome page for configurations where authentication is required.md5.js— Auxiliary JavaScript function for calculating MD5 sums when authentication is required.
The archive can be uploaded via the Welcome page form in the module web interface. The example is small enough to be stored in the router filesystem.
Information
Licenses
This section lists the Open-Source Software (OSS) licenses used by this Router App.

Attachment A: Statistics Distribution Protocol
Statistical data are sent from the Router App via HTTPS using the POST method, divided into three messages: cust-list (connected customers), domain-list (visited domains), and utilization-list (used services). The distribution period and server address are configured on the Global configuration page. This Router App requires router firmware 4.0.0 or later.
Cust-list: List of Connected Customers
POST /cust-list.php HTTP/1.1
User-Agent: CaptivePortal
Host: Host IP address
Accept: */*
Content-Length: Message length
Content-Type: application/x-www-form-urlencoded
ap_mac[$i]=$AP_MAC&ap_ip[$i]=$AP_IP×tamp[$i]=$NOW&connected[$i]
=2&mac[$i]=$MAC&ipaddr[$i]=$IP&download[$i]=0&upload[$i]=0&since[$i]=$NOW&url[$i]
=$3&useragent[$i]=$4&...Fields:
ap_mac— MAC address of the access point (Extended format only).ap_ip— IP address of the access point (Extended format only).timestamp— Data timestamp (Unix format,date +%s).connected—0: customer disconnected;1: customer connected, existing entry updated;2: customer connected, new entry created.mac— MAC address of the customer.ipaddr— IP address of the customer.download— Total downloaded data.upload— Total uploaded data.since— Connected since (Unix format,date +%s).useragent— Web browser type.
Domain-list: List of Visited Domains
POST /domain-list.php HTTP/1.1
User-Agent: CaptivePortal
Host: Host IP address
Accept: */*
Content-Length: Message length
Content-Type: application/x-www-form-urlencoded

ap_mac[$i]=AP_MAC&ap_ip[$i]=$AP_IP&year[$i]=$YEAR&month[$i]
=$MONTH&day[$i]=$DAY&time[$i]=$TIME&domain[$i]=$DOMAIN&ip[$i]=$IP&...
Fields:
ap_mac— MAC address of the access point (Extended format only).ap_ip— IP address of the access point (Extended format only).year— Year of domain visit.month— Month of domain visit.day— Day of domain visit.time— Time of domain visit (hh:mm:ss).domain— Visited domain.ip— IP address of the visiting customer.
Utilization-list: List of Used Services
POST /utilization-list.php HTTP/1.1
User-Agent: CaptivePortal
Host: Host IP address
Accept: */*
Content-Length: Message length
Content-Type: application/x-www-form-urlencoded
ap_mac[$i]=$AP_MAC&ap_ip[$i]=$AP_IP×tamp[$i]=$NOW&netpool[$i]
=$W_NETWORK&category[$i]=2&rxbytes[$i]=RXBYTES&txbytes[$i]=$TXBYTES&...Fields:
ap_mac— MAC address of the access point (Extended format only).ap_ip— IP address of the access point (Extended format only).timestamp— Data timestamp (Unix format,date +%s).netpool— Monitored network (WLAN, LAN).category— Service type:1— other;2— HTTP/HTTPS;3— FTP;4— SMTP;5— IMAP/POP3 and variants.rxbytes— Received data for the category.txbytes— Sent data for the category.