OpenVPN Custom Config
Caution
- This Router App has been tested on a router with firmware version 6.3.10. After updating the router firmware to a higher version, check whether a newer version of the Router App has also been released and update it accordingly for compatibility.
Description
The OpenVPN Custom Config Router App allows configuring up to four additional OpenVPN tunnels on the router. Unlike the router's built-in OpenVPN configuration page, this Router App has no classic configuration menu — each OpenVPN tunnel is configured via a single text field that accepts the standard *.ovpn configuration file format.
The advantage of this approach is that an existing OpenVPN configuration can be applied directly to the router. The downside is that no validation is performed on the entered configuration, which can result in tunnels that fail to establish or behave unexpectedly, with limited troubleshooting options.
Web Interface
Once the Router App is installed, its web interface can be accessed by clicking the Router App name on the Router Apps page of the router's web interface.
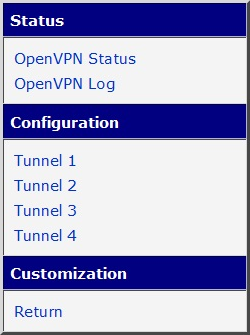
The left pane of the web interface contains a Status section followed by a Configuration section with configuration pages for all four OpenVPN tunnels. The Customization section contains only the Return item, which returns to the router's main web configuration interface. The menu is shown in the figure below.
Module Usage
Configuration Page
The Configuration section contains configuration pages for all four OpenVPN tunnels, from Tunnel 1 to Tunnel 4. The default state of the configuration page for Tunnel 1 is shown in the figure below.
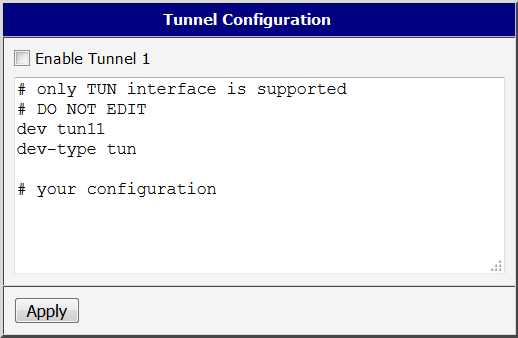
The configuration field begins with four lines that should not be edited — they declare the tunnel type and interface name. The interface name for Tunnel 1 is tun11, incrementing to tun14 for Tunnel 4.
Below these lines is the section for your tunnel configuration. Note that only OpenVPN features documented in the router manual are supported by this Router App. Other settings may not work as expected.
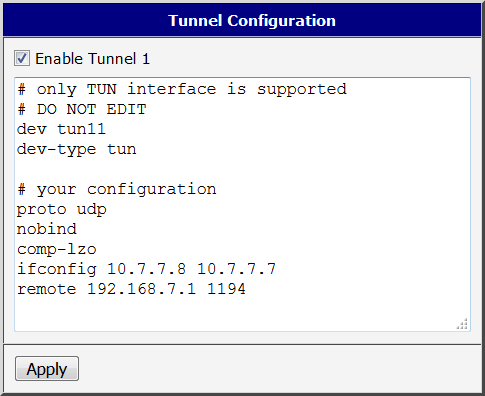
An example tunnel configuration is shown in the figure below. To save changes, click the Apply button. To apply the configuration and create the OpenVPN tunnel, check the Enable checkbox at the top and click Apply.
Status Page
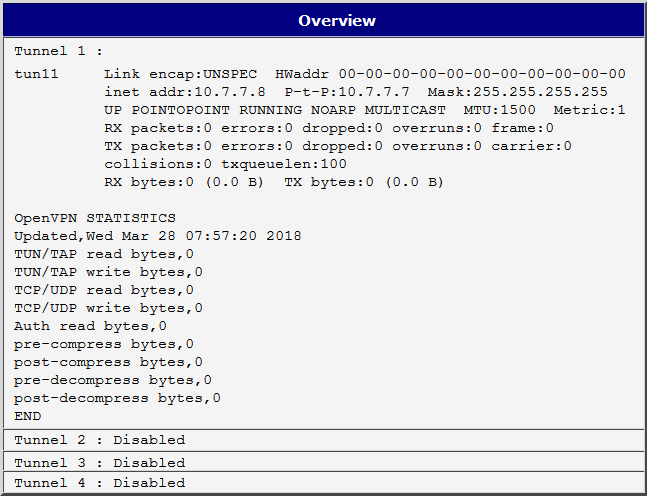
The OpenVPN Status page lists the status of all four OpenVPN interfaces. If a tunnel has been initialized, its interface name and status are displayed. If a tunnel is not enabled, it is shown as Disabled. An example of the status page is shown in the figure below.
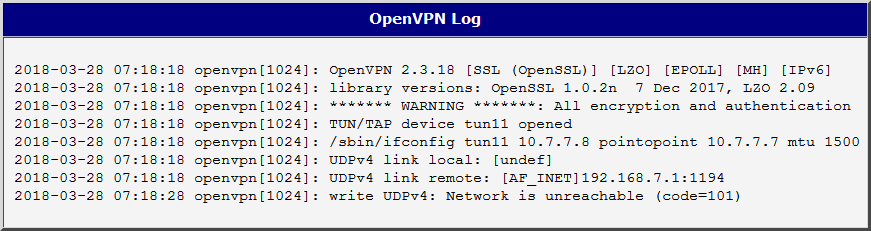
Log Page
The OpenVPN Log page displays detailed log messages for all four OpenVPN interfaces configured in this Router App, as well as for all four standard OpenVPN interfaces configured via the router's web interface. This information is useful for debugging, particularly for issues with interface initialization caused by an incorrect configuration. An example of the log page is shown in the figure below.