Docker
What is Docker?
Docker is an open platform for developing, shipping, and running applications. Docker enables you to separate your applications from your infrastructure so you can deliver software quickly. With Docker, you can manage your infrastructure in the same ways you manage your applications. By taking advantage of Docker's methodologies for shipping, testing, and deploying code quickly, you can significantly reduce the delay between writing code and running it in production.
Docker provides the ability to package and run an application in a loosely isolated environment called a container. The isolation and security allow you to run many containers simultaneously on a given host. Containers are lightweight and contain everything needed to run the application, so you do not need to rely on what is currently installed on the host. You can easily share containers while you work, and be sure that everyone you share with gets the same container that works in the same way.
Docker Objects
When you use Docker, you are creating and using images, containers, networks, volumes, plugins, and other objects. This section is a brief overview of some of those objects.
Image
An image is a read-only template with instructions for creating a Docker container. Often, an image is based on another image, with some additional customization. For example, you may build an image based on the ubuntu image that installs the Apache web server and your application, along with the configuration details needed to make it run.
You might create your own images or use those created by others and published in a registry. To build your own image, you create a Dockerfile with a simple syntax for defining the steps needed to create and run the image. Each instruction in a Dockerfile creates a layer in the image. When you change the Dockerfile and rebuild the image, only the changed layers are rebuilt. This is part of what makes images lightweight, small, and fast compared to other virtualization technologies.
Container
A container is a runnable instance of an image. You can create, start, stop, move, or delete a container using the Docker API or CLI. You can connect a container to one or more networks, attach storage to it, or even create a new image based on its current state.
By default, a container is relatively well isolated from other containers and its host machine. You can control how isolated a container's network, storage, or other underlying subsystems are from other containers or the host machine.
A container is defined by its image as well as any configuration options provided at creation or startup. When a container is removed, any state changes not stored in persistent storage are lost.
Example docker run Command
The following command runs an ubuntu container, attaches interactively to your local command-line session, and runs /bin/bash:
$ docker run -i -t ubuntu /bin/bash
When you run this command, the following happens (assuming the default registry configuration):
- If you do not have the
ubuntuimage locally, Docker pulls it from your configured registry, as though you had rundocker pull ubuntumanually. - Docker creates a new container, as though you had run
docker container createmanually. - Docker allocates a read-write filesystem to the container as its final layer. This allows a running container to create or modify files and directories in its local filesystem.
- Docker creates a network interface to connect the container to the default network, including assigning an IP address. By default, containers can connect to external networks using the host machine's network connection.
- Docker starts the container and executes
/bin/bash. Because the container is running interactively and attached to your terminal (due to the-iand-tflags), you can provide input using your keyboard while output is logged to your terminal. - When you type
exitto terminate/bin/bash, the container stops but is not removed. You can start it again or remove it.
Docker Router App Description
Caution
- Supported routers: SmartStart SL305, ICR-3200 family, and ICR-4400 family.
- Router firmware version 6.3.2 or above is required for the Docker Router App to work properly.
- This Router App has been tested on router firmware version 6.3.10. After updating the router firmware, check whether a newer version of this app has been released, as an update may be required for compatibility.
When uploaded to the router, the Router App is accessible in Customization → Router Apps in the router's web interface. Click on the Router App title to open its menu:

The Status section provides the Overview, Statistics, Log, and Events pages. The Configuration section contains the Global page. The Administration section contains pages for managing Images, Containers, and Volumes, and for Login and Logout. The Information section provides the Licenses page. The Return item in the Customization section returns to the router's main menu.
Tips
The Compose Container menu item is not available on ICR-3xxx routers.
Status
Overview
The Overview page consists of four parts. The first, Service, shows the Router App status:

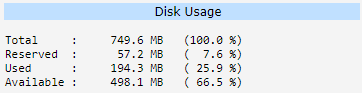
The second shows disk usage:
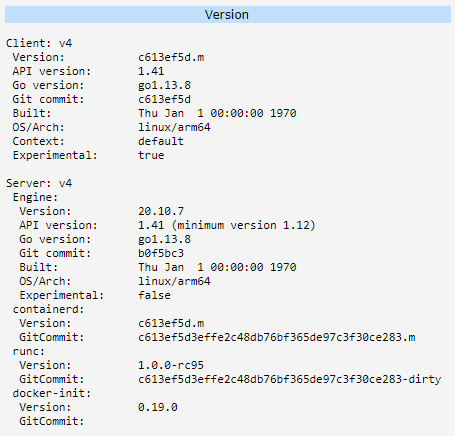
The third shows the Docker Router App version:
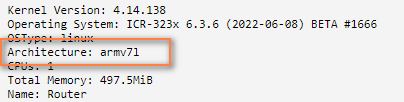
The fourth contains additional system information:
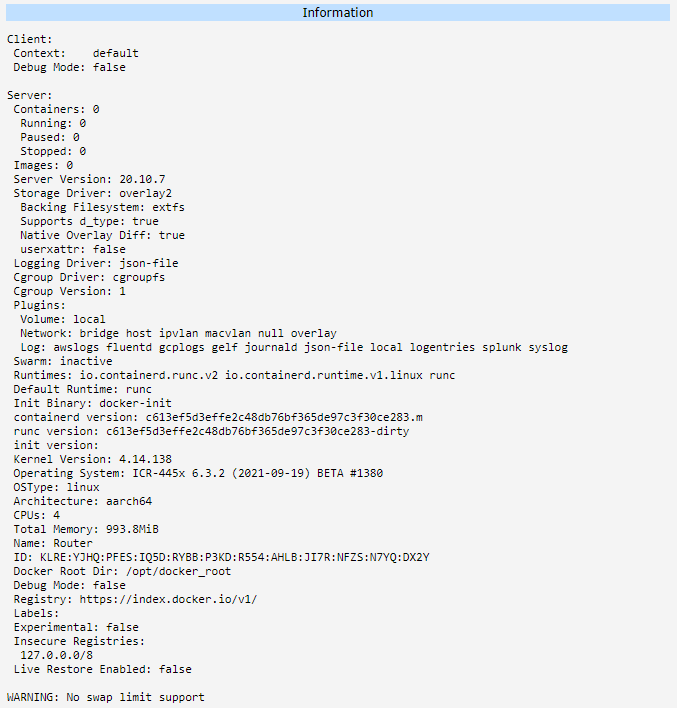
One item worth noting in the Information section is Architecture. This is useful when you are unsure whether your router's architecture supports a specific image.
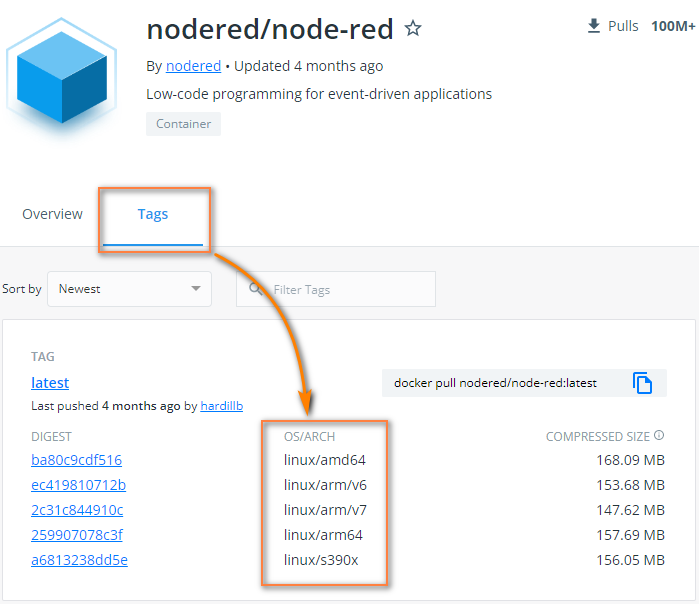
To check which architectures an image supports, visit Docker Hub, search for the image, and check the Tags tab.
Statistics
This page shows real-time statistics for running containers:

| Column | Description |
|---|---|
| CONTAINER ID | ID of the container |
| NAME | Name of the container |
| CPU % | Current CPU usage |
| MEM USAGE / LIMIT | Current memory usage / memory limit |
| MEM % | Current memory usage as a percentage of the limit |
| NET I/O | Current network I/O |
| BLOCK I/O | Current disk I/O |
| PIDS | Process IDs |
Statistics columns
Log
This section contains detailed log messages from the Docker Router App, divided into two parts: Containerd Log Messages and Dockerd Log Messages.
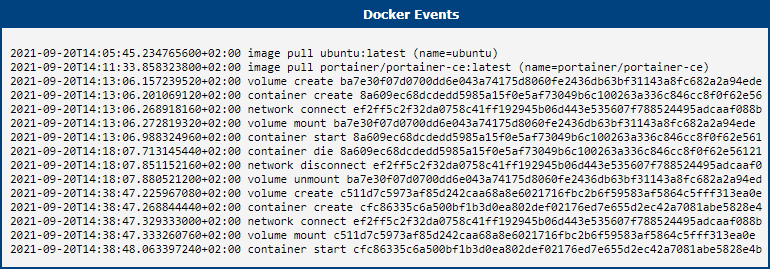
Events
This section lists Docker events generated by your usage.
Configuration
Global
Docker Router App configuration is on the Global page.

| Item | Description |
|---|---|
| Enable Docker Service | Enables Docker functionality. This option alone is sufficient to start using the Docker Router App. |
| IP Address | Docker automatically assigns its own IPv4 address. If needed, you can specify a custom IPv4 address. For IPv6, Docker does not assign an address automatically — enter the desired IPv6 address if one is required. |
| Subnet Mask / Prefix | Specify a custom subnet mask or prefix if needed. |
| Data Root | Storage location for Docker's data root. Available options vary by router model: • Internal eMMC • SD Card • USB Flashdrive • SATA harddrive (v4 routers only) The selected storage must use a supported filesystem (ext2, ext3, or ext4). |
| Enable Insecure Registries | Enable to use a custom registry without HTTPS. Up to 4 registries can be added. |
| Enables Debug Mode | When enabled, additional data is written to the logs. |
| Enables Experimental Features | Enables experimental Docker features. |
Global configuration items
Administration
This section allows you to manage Images, Containers, and Volumes, and to log in and out of your preferred registry.
Tips
All actions in the Administration section are available only when Docker is enabled and running.
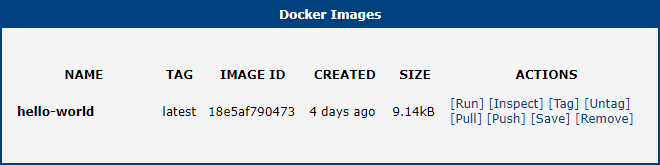
Images
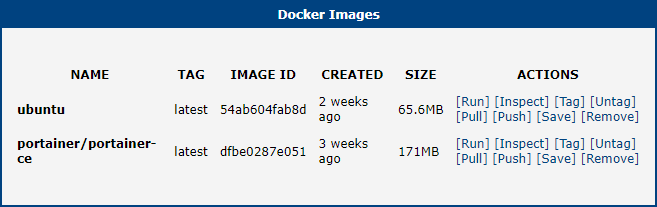
The Images page lists all available images.
| Column | Description |
|---|---|
| Name | Name of the image |
| Tag | Tag of the image |
| Image ID | ID of the image |
| Created | Date the image was created |
| Size | Size of the image |
| Actions | Available actions for the image |
Docker images columns
Image Actions
Each image has eight available actions:
| Action | Description |
|---|---|
| Run | Runs the image and creates a container. |
| Inspect | Displays detailed information about the image. |
| Tag | Creates a tag for the image. |
| Untag | Removes a tag. Removing the last tag also removes the entire image. |
| Pull | Pulls an image from a registry. |
| Push | Pushes an image to a registry. |
| Save | Saves the image as a tar archive. |
| Remove | Removes the image. An image cannot be removed if it has multiple tags or if a container based on it already exists. |
Image actions
Run Image
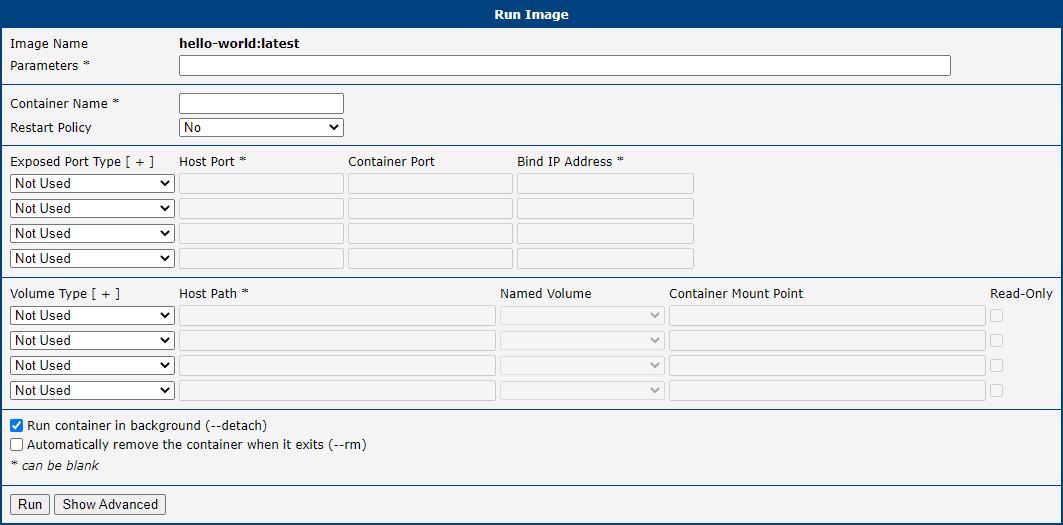
The Run action creates a container from the selected image. After clicking Run, the configuration options appear. There are two levels: Basic (always visible) and Advanced (shown after clicking Show Advanced).
In the simplest case, clicking Run is sufficient — the image will either start or return an error message. Some images require specific parameters to be filled in. The correct run configuration is defined by the image's author.

| Item | Description |
|---|---|
| Parameters | Parameters for the container or the service running inside it. |
| Container Name | Name of the container. If left blank, a random name is assigned. |
| Restart Policy | Defines the restart behavior when a container exits. • no: Do not restart the container automatically. This is the default. • on-failure: Restart only if the container exits with a non-zero exit code. The number of retries can optionally be limited. • unless-stopped: Always restart the container regardless of the exit status, including on daemon startup, unless it was explicitly stopped before the daemon was stopped. • always: Always restart the container regardless of the exit status, including on daemon startup. |
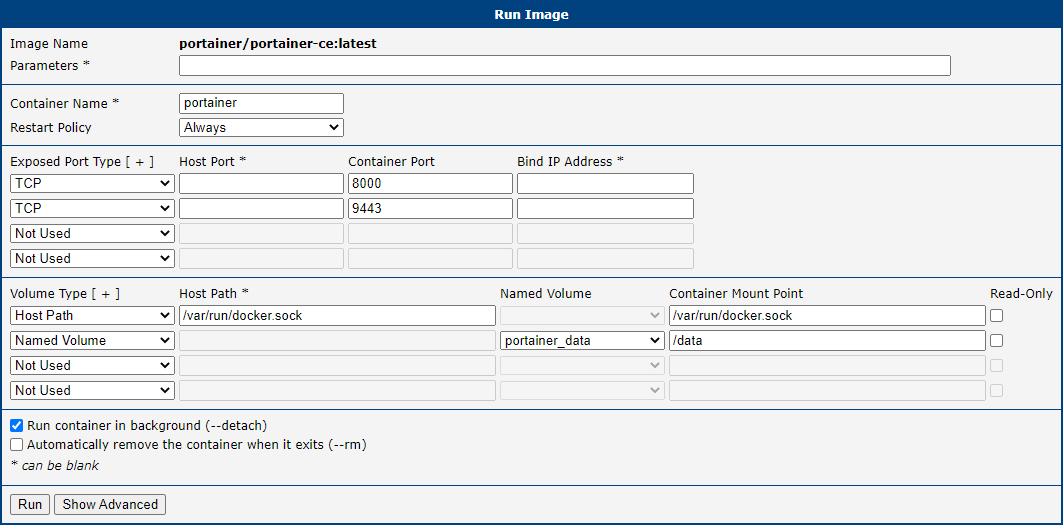
| Exposed Port Type | Maps or binds ports for the container. Specify the container port; the host port only needs to be set if it differs. Optionally, restrict listening to a specific interface by entering its IP address. |
| Volume Type | Data storage for the container. Two options are available: • Host path: A specific path on the router's filesystem. • Named Volume: A volume selected from the available named volumes. |
| Run Container in background | If enabled, the container runs in the background. Enabled by default, as most services should run continuously. |
| Automatically remove the container when it exits | When enabled, the container is automatically removed when it stops, saving you from having to remove it manually. |
Run Image — basic options
Advanced options are hidden by default to keep the dialog concise:
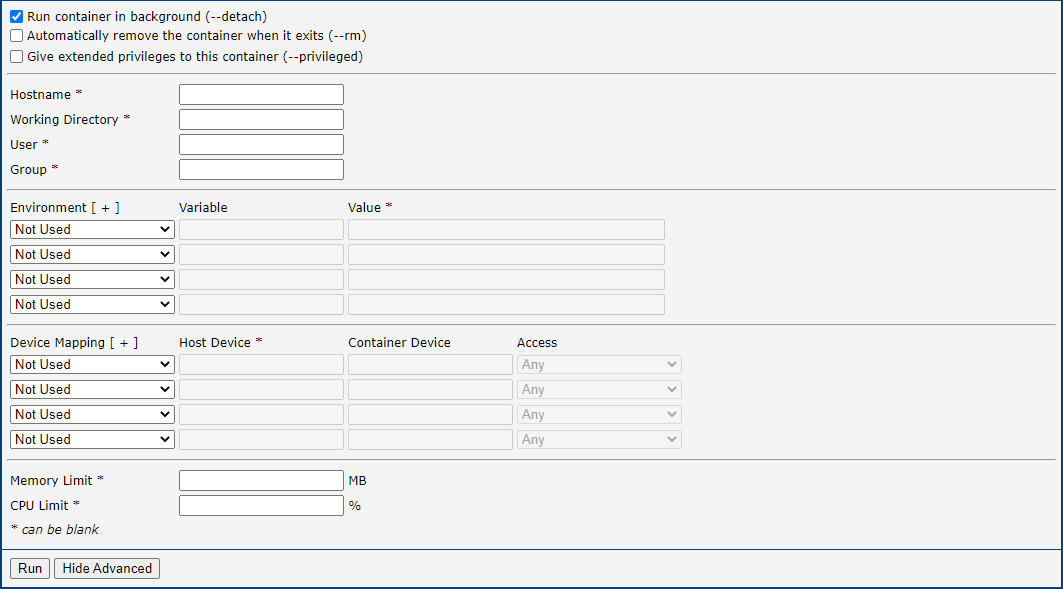
| Item | Description |
|---|---|
| Give extended privileges to this container | Grants all capabilities to the container (--privileged), lifting limitations enforced by the device cgroup controller. Use for special cases such as running Docker within Docker. |
| Hostname | Hostname of the container. |
| Working Directory | The directory in which the container starts (e.g., /tmp/ to handle temporary files). |
| User | The user under which the container runs. |
| Group | The group under which the container runs. |
| Environment | Set or override environment variables in the container. |
| Device Mapping | Directly exposes a device (e.g., a block device, loop device, or audio device) to the container without granting full --privileged access. |
| Memory Limit | Memory limit for the container. By default the container may use all available memory; specify a limit to restrict usage. |
| CPU Limit | CPU usage limit in percent. One core equals 100%, so on a 4-core v4 router, 400% is the absolute maximum. |
Run Image — advanced options
After running an image, the resulting Container ID is displayed:

Transforming a Docker Run Command into Run Image
Suppose you want to run the netdata image. After finding it on Docker Hub and locating the official run instructions, you get the following command:
docker run -d --name=netdata \
   -p 19999:19999 \
   -v netdataconfig:/etc/netdata \
   -v netdatalib:/var/lib/netdata \
   -v netdatacache:/var/cache/netdata \
   -v /etc/passwd:/host/etc/passwd:ro \
   -v /etc/group:/host/etc/group:ro \
   -v /proc:/host/proc:ro \
   -v /sys:/host/sys:ro \
   -v /etc/os-release:/host/etc/os-release:ro \
   --restart unless-stopped \
   --cap-add SYS_PTRACE \
   --security-opt apparmor=unconfined \
   netdata/netdata
Each parameter maps to a field in the Run Image dialog:
Ports (-p 19999:19999): The first number is the host (router) port, the second is the container port. When they are identical, only the Container Port field needs to be filled in. TCP is the default protocol.

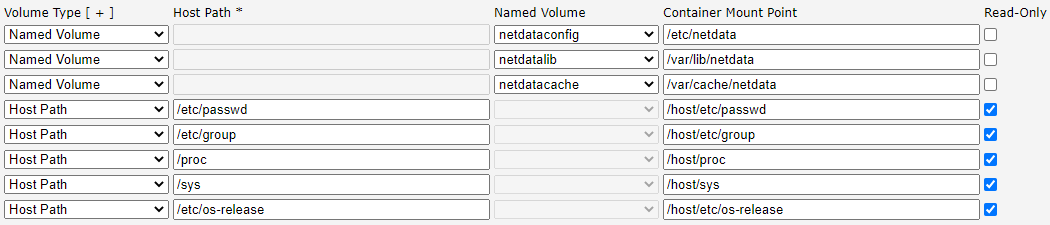
Volumes (lines 3–10, -v arguments): If the argument starts with a slash, use Host Path; otherwise use Named Volume. The Container Mount Point is the part after the colon. For entries ending with :ro, check the Read-Only checkbox. For instructions on creating named volumes, see the Volumes section.

Lines 3–5 are named volumes; lines 6–10 are host paths. After filling in all volumes, the configuration should look like this:
Restart Policy (--restart unless-stopped):

The --cap-add and --security-opt lines can be skipped — the image runs correctly without them. Once all settings are configured, click Run to create the container.
Search Image
Caution
A working internet connection is required to use the Search Image function.
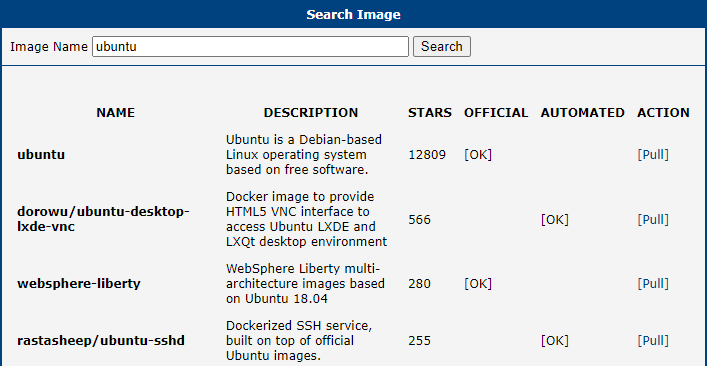
The first way to obtain images is via Search Image, which lets you search Docker's official repository directly. The following example searches for the ubuntu image:
Tips
The official Docker image repository is Docker Hub.
| Column | Description |
|---|---|
| Name | Name of the image |
| Description | Description of the image |
| Stars | Rating of the image |
| Official | Official images have clear documentation, promote best practices, and are designed for the most common use cases. |
| Automated | Images that Docker Hub builds automatically from source code in an external repository. |
| Action | Available actions for the image |
Search image columns
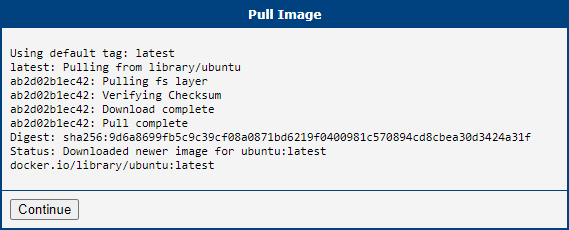
To use an image, click the Pull action on the right side of the result.
Tips
Depending on the image size, pulling may take several minutes.
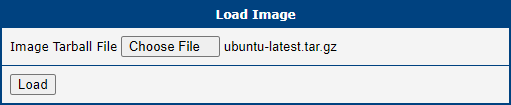
Load Image
Images can also be loaded directly from the filesystem as a tar archive. This includes images previously saved with the Save action described in the Image Actions section.
Build Image
The third way to get a Docker image is via Build Image. Two options are available:
Edit — write the Dockerfile directly in the web interface. The following example builds a simple image that greets users in the log:
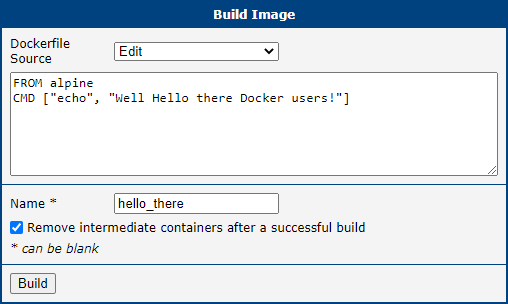
| Item | Description |
|---|---|
| Name | Name of the image as it will appear in the image list. |
| Remove intermediate containers after successful build | Support containers may be created during the build. This option removes them automatically when they are no longer needed. |
Build image options
After building and running the image, the container log shows the greeting:

Tips
For tips and best practices on writing Dockerfiles, see the Docker documentation.
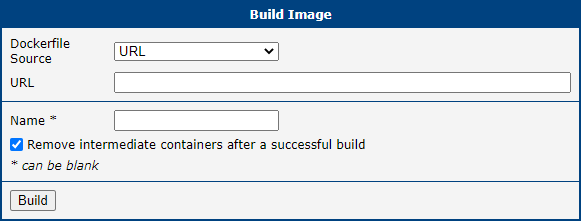
URL — provide the URL of a Dockerfile for Docker to fetch and build:
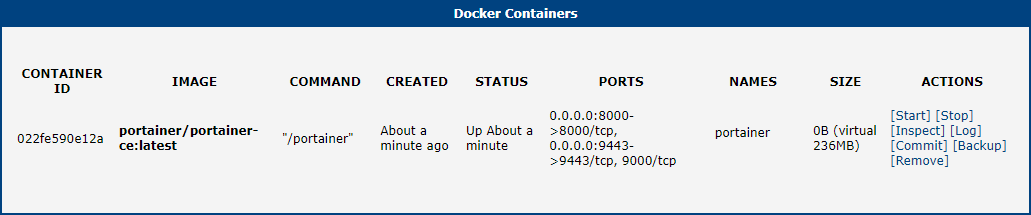
Containers
The Containers page lists all available containers.
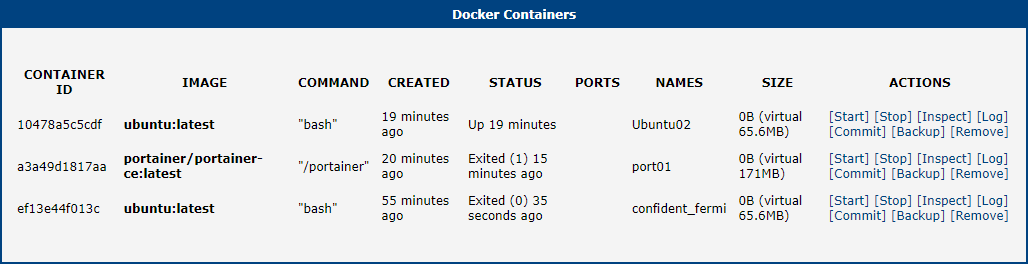
| Column | Description |
|---|---|
| Container ID | ID of the container |
| Image | Source image |
| Command | The command associated with the container |
| Created | Container creation date |
| Status | Current status of the container |
| Ports | Ports declared in the Run Image configuration |
| Names | Name of the container |
| Size | Current size of the container |
| Actions | Available actions for the container |
Containers columns
Container Actions
Each container has seven available actions:
| Action | Description |
|---|---|
| Start | Start a stopped container. |
| Stop | Stop a running container. |
| Inspect | Display detailed information about the container. |
| Log | Fetch the container's logs. |
| Commit | Create a new image from the container's current state. |
| Backup | Save the container and all its data as a tar file. |
| Remove | Remove the container. |
Container actions
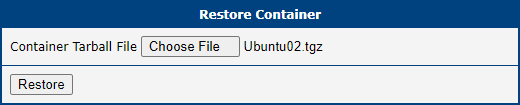
Restore Container
The Restore Container section allows you to restore a container from a backup tar file created with the Backup action.
Compose Container
Compose Container is similar to Build Image — you write a container definition and deploy it. Two options are available:
Edit — write the Docker Compose definition directly in the web interface:
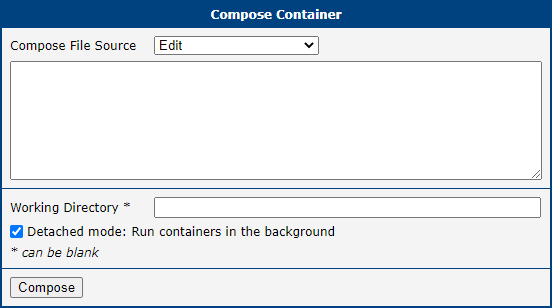
| Item | Description |
|---|---|
| Working directory | The directory in which the container runs. Required when the container needs to access specific files from the router's filesystem. |
| Detached mode: Run containers in the background | Switches between background and foreground container execution. |
Compose container options
Tips
For tips and best practices on writing Compose files, see the Docker documentation.
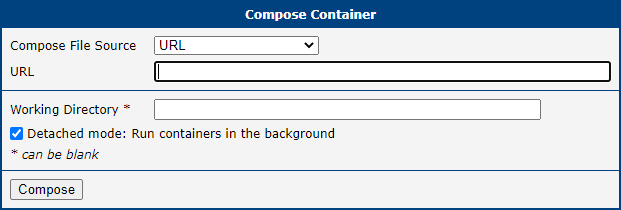
URL — provide the URL of a Docker Compose definition file:
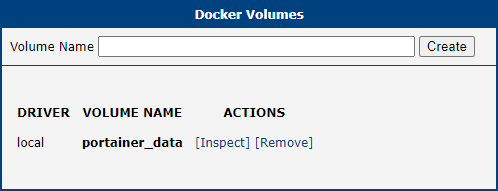
Volumes
Volumes are the preferred mechanism for persisting data generated by and used by Docker containers. Unlike bind mounts, which depend on the directory structure and OS of the host machine, volumes are managed entirely by Docker. Volumes are also a better choice than persisting data in a container's writable layer, because a volume does not increase the container's size and its contents persist beyond the container's lifecycle.

To create a volume, enter a name and click Create. The volume will then be available in the Run Image Volume Type dropdown.
Volume Actions
Each volume has two available actions:
| Action | Description |
|---|---|
| Inspect | Display detailed information about the volume. |
| Remove | Remove the volume. |
Volume actions
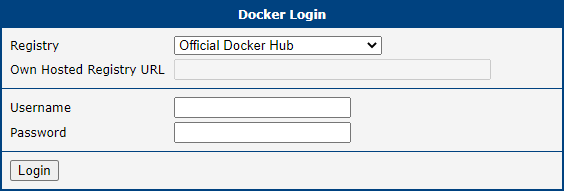
Login
You can log in to the Official Docker Hub or a custom Own Hosted registry. For Docker Hub, enter your Username and Password. For a custom registry, also provide the Own Hosted Registry URL. The login persists across router restarts; use Logout to remove it.
Logout
This section allows you to log out from previously logged-in registries.
Information
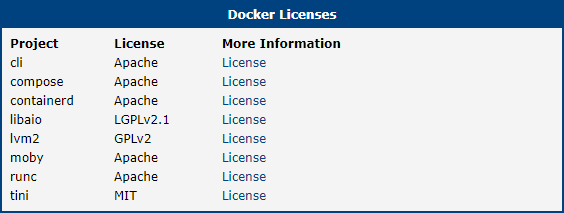
Licenses
The Licenses page lists all Open-Source Software licenses used in this Router App.
Examples
The following examples provide step-by-step instructions for obtaining, running, and verifying Docker images.
Example 1: Hello World
The first step is always finding the right image. Navigate to Search Image and search for hello-world:
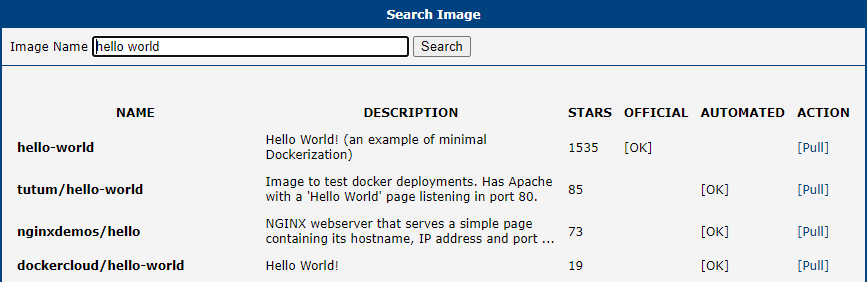
The top result has the most stars, is from an official source, and is exactly what we need. Pull it:
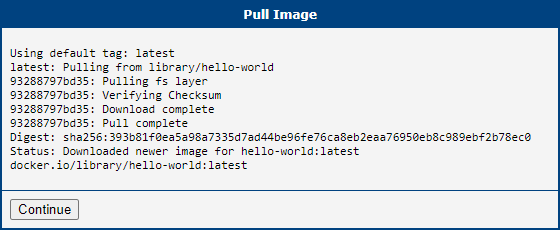
The image is pulled and ready to run:
This image is simple enough that no Run Image parameters are needed:
After running, the full Container ID is displayed:

Navigate to the Containers page — the container is listed there:

Open the container log to confirm that Hello World ran successfully:
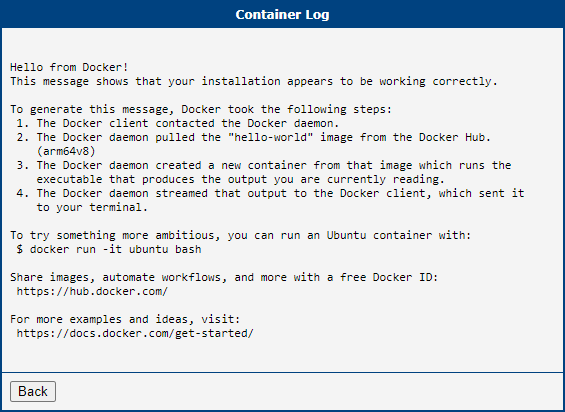
That's it!
Example 2: Portainer
Now let's look at something more challenging — Portainer. Start by searching for the image:
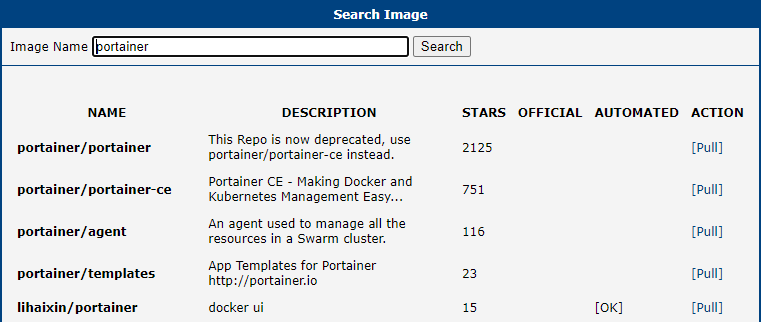
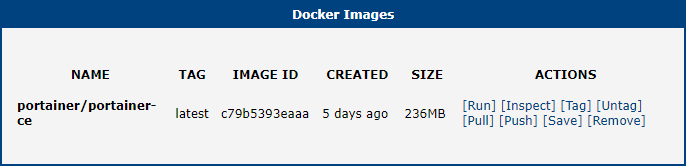
The first result has a deprecation notice: "This Repo is now deprecated, use portainer/portainer-ce instead." Select the second result and pull it:
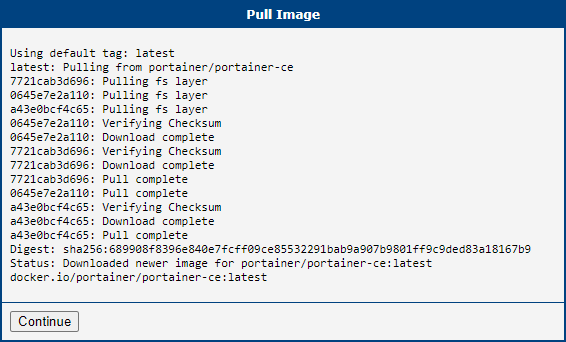
The image is pulled and ready:
Unlike Hello World, Portainer requires specific run parameters. Find the official run instructions by searching for the image on Docker Hub:

Find the image's detail page for a link to the official documentation:
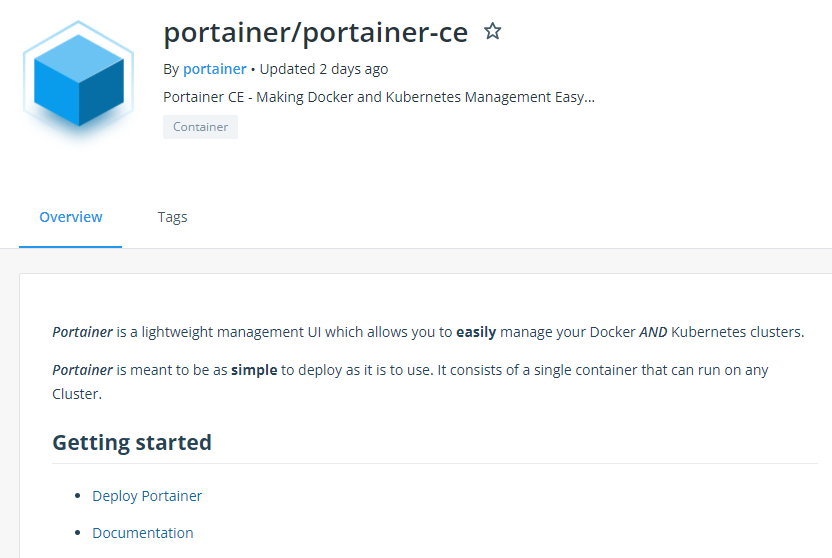
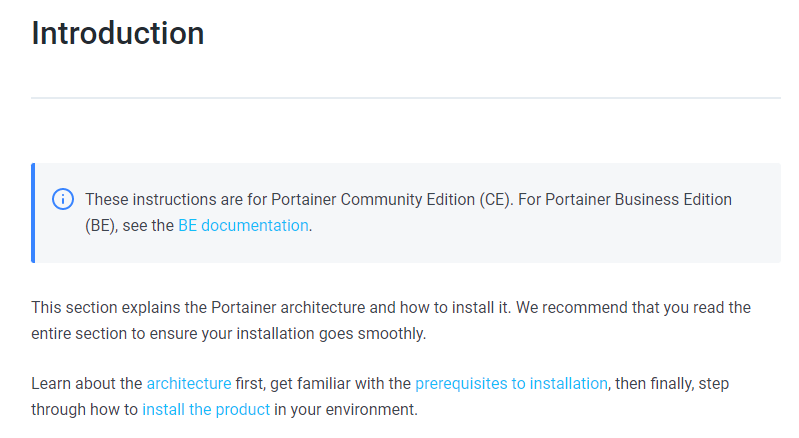
Click Deploy Portainer to be redirected to the official Portainer documentation at docs.portainer.io:
Navigate to Install the product → Set up a new Portainer Server installation → Docker Standalone → Install Portainer with Docker on WSL / Docker Desktop to find the Docker run command:
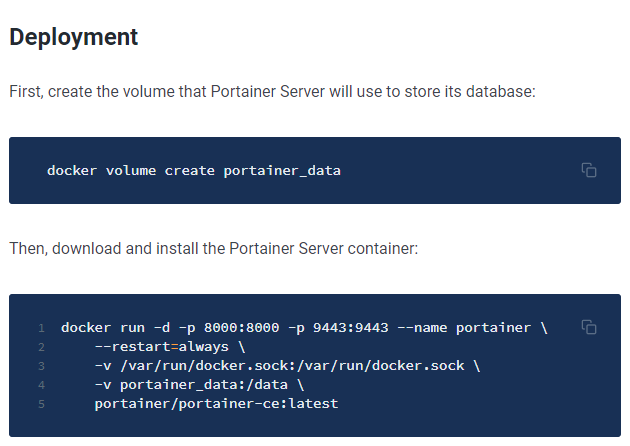
Using the knowledge from the Transforming a Docker Run Command section, first create the required volume:
Then configure the Run Image dialog for Portainer:
Click Run to start the container:

The Portainer container now appears in the container list:
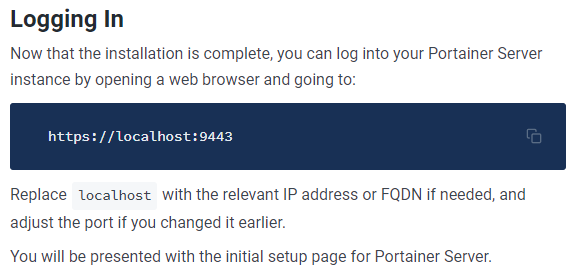
According to the official guide, access the Portainer admin interface by navigating to https://<router-ip>:9443 in your browser:
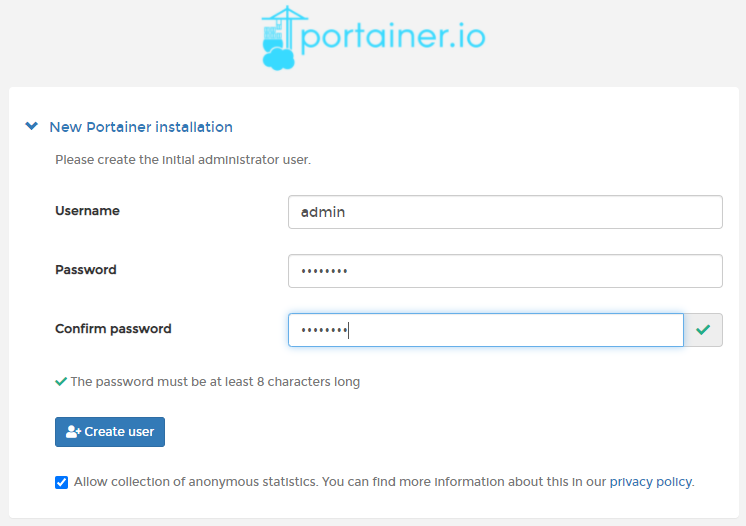
Create an admin user account:
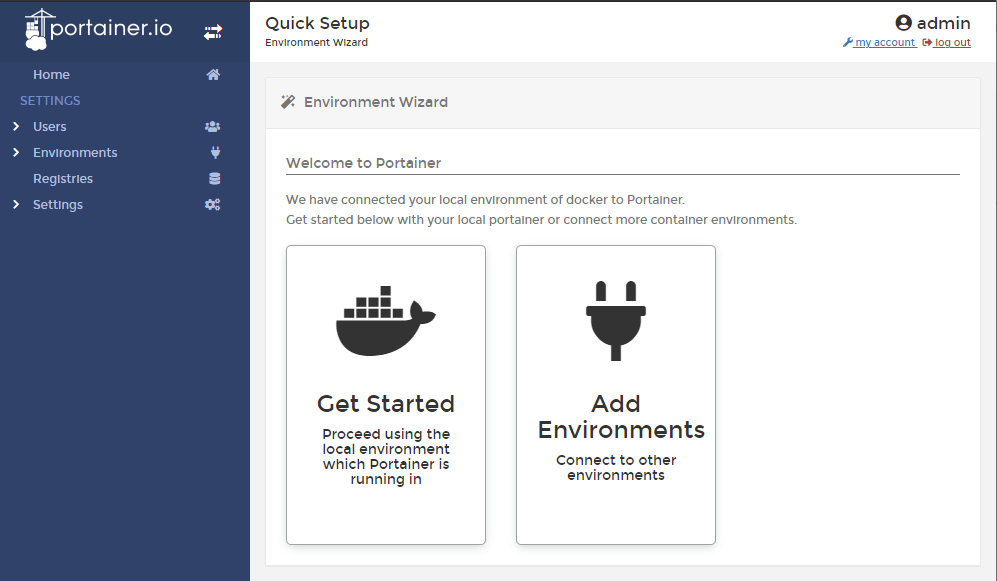
After logging in, the Portainer dashboard is fully operational:
Troubleshooting
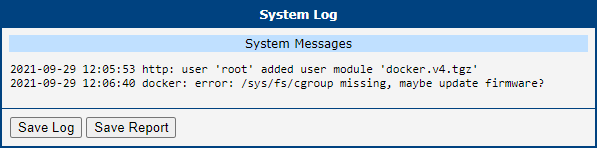
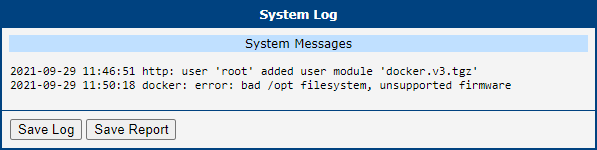
Two types of errors can occur when working with the Docker Router App. Both can be found in the router's System Log.
Unsupported Firmware
This error typically appears on v3 routers, which do not have eMMC memory and are not capable of running the Docker Router App.
Caution
eMMC memory is required to run the Docker Router App. An SD Card alone is not sufficient.
Update Firmware
This error indicates that the router firmware is older than the required version 6.3.2. Updating the firmware to at least version 6.3.2 should resolve the issue.