STunnel
Caution
- This Router App has been tested on a router with firmware version 6.3.10. After updating the router firmware to a higher version, check whether a newer version of the Router App has also been released and update it accordingly for compatibility.
Description
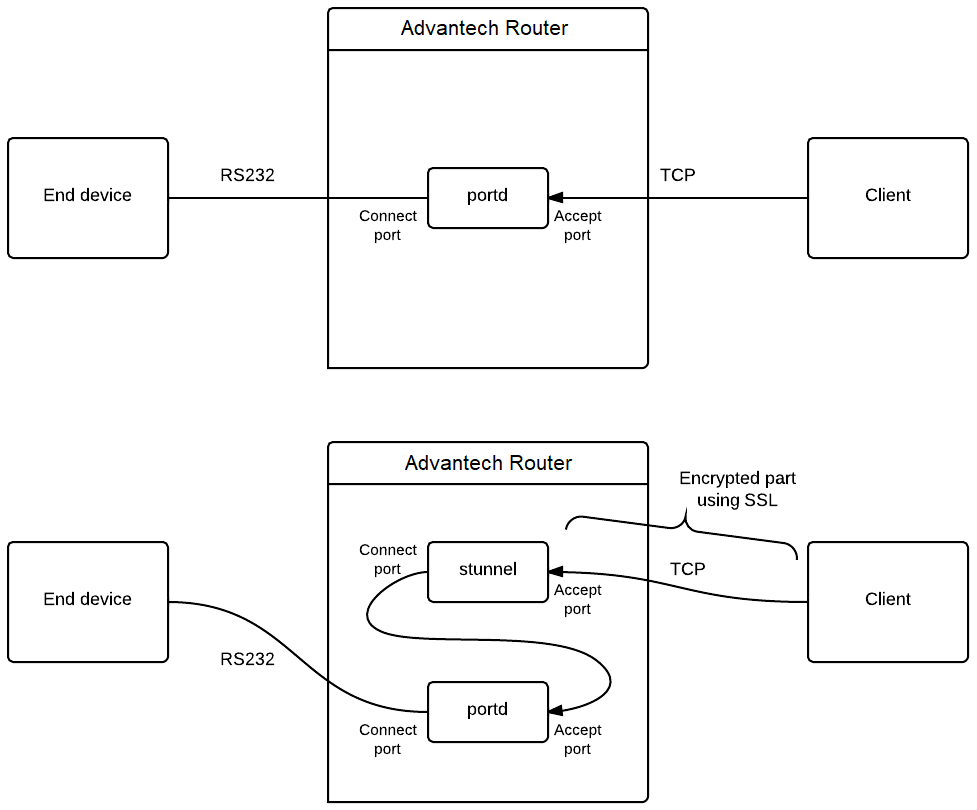
This Router App allows the router to create an encrypted network tunnel in which data at one end is wrapped in SSL — either encrypted on input and decrypted on output, or vice versa. Stunnel is primarily designed for adding SSL encryption to communication channels that cannot support it natively, significantly increasing communication security. It can be used to add SSL encryption to commonly used inetd-based servers (POP2, POP3, IMAP) as well as standalone servers (NNTP, SMTP, HTTP) and PPP tunnels.
The figure below illustrates the change in communication after activating Stunnel:
The Router App web interface is accessible by clicking the Router App name on the Router Apps page of the router's web interface. The left menu contains: Status (with System Log), Configuration (with Global, where all settings are located), Information (with license details), and Customization (with Return to go back to the router's interface).
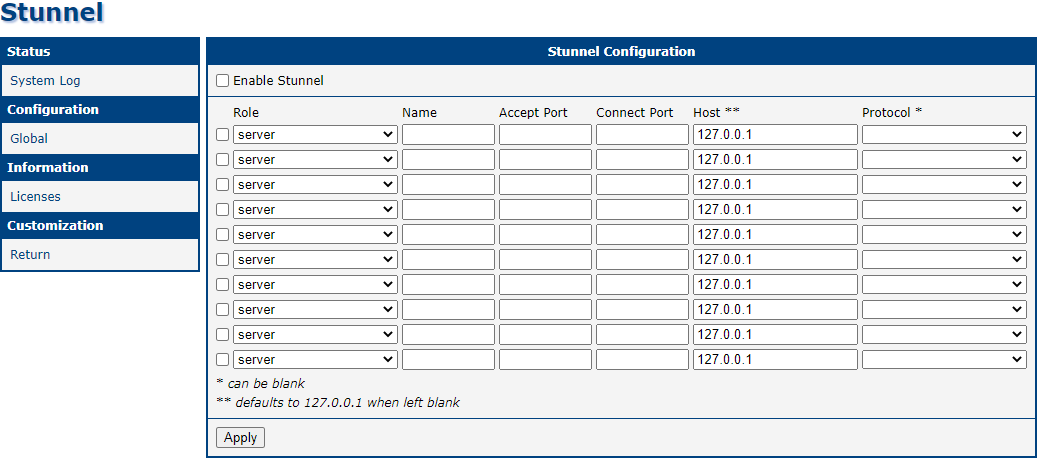
Configuration
Configuration is performed via the Global form in the Router App web interface. The Enable Stunnel checkbox at the top activates the Router App. The remaining items are described in the table below:
| Item | Description |
|---|---|
| Enable Stunnel | Enables or disables the defined Stunnel instance. |
| Role | Select the role of this Stunnel instance: server or client. |
| Name | An arbitrary name for the Stunnel instance. |
| Accept Port | Port number on which connections are accepted. |
| Connect Port | Remote port number to which data is forwarded. |
| Host | Address of the server to which Stunnel connects. |
| Protocol | Application protocol used for transport wrapping. Options: SMTP, IMAP, POP3, CIFS, NNTP, or none (unspecified). |
Configuration items
Example
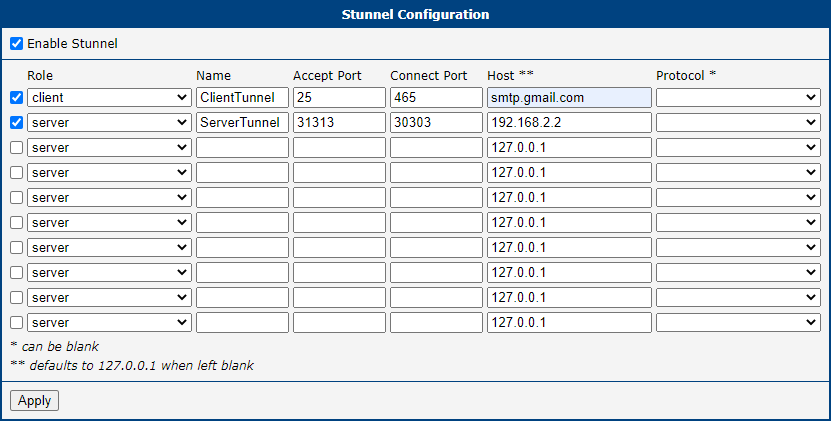
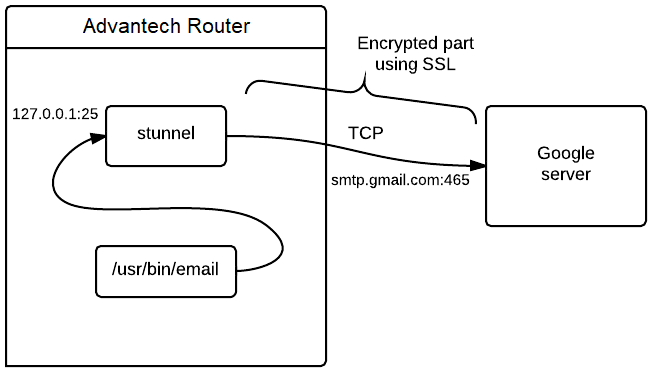
The following example shows how to wrap SMTP email traffic in SSL using Stunnel configured in client mode:
- Set Role to client.
- Enter any Name, e.g.,
smtp_test. - Set Accept Port to
25. - Set Connect Port to
465. - Set Host to the email provider's SMTP server, e.g.,
smtp.gmail.comfor Gmail. - Enable the checkbox for the configured Stunnel instance, and enable the Enable Stunnel checkbox to activate the Router App.
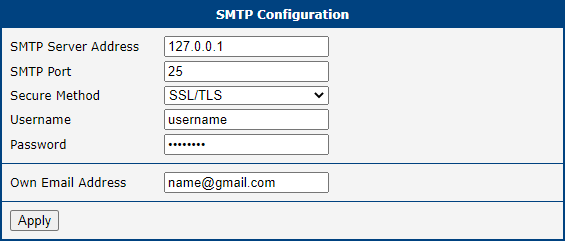
It is also necessary to configure SMTP in the router's web interface:
- Set SMTP Server Address to
127.0.0.1(localhost). - Enter your login credentials in the Username and Password fields.
- Enter your email address in the Own Email Address field.
The figure below shows a schematic diagram of the described example:
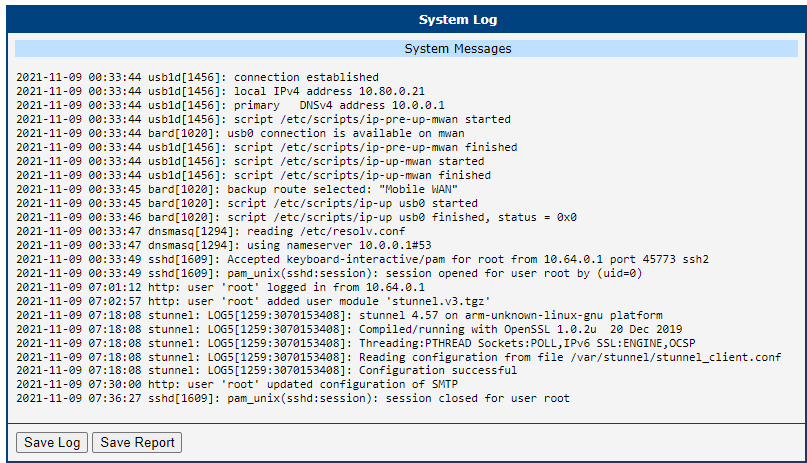
System Log
In case of connection problems, the system log can be viewed by clicking System Log in the menu. It displays detailed reports from all applications running on the router. Activity of the Stunnel Router App appears in rows starting with stunnel. Click Save Log to save the system log to your computer.
Licenses
This section summarizes the Open-Source Software (OSS) licenses used by this Router App.
